Showing posts with label diy. Show all posts

Friday, April 23, 2021

Homemade Wedding Invitations: Spring Pastel


Pastel colors are reminiscent of spring weddings, and they are a lovely theme for your wedding. Homemade wedding invitations are a personal way to invite your guests, and you can make lovely pastel invitations easily. This article will provide you with all the necessary information for creating homemade wedding invitations with spring pastel colors in mind.

Paper Patterns

A simple pastel wedding invitation can be made for your spring wedding using pastel colored cardstock, scissors, and glue. For this homemade craft you can use scissors with decorative edges if you have them handy.

Start by folding a piece of cardstock in half. Then use the scissors to cut out several shapes from other pastel colored pieces of cardstock. Arrange the card stock in a fun pattern in the corners or along the sides of the wedding invitation. Remember to arrange the paper in a pattern before applying glue to your homemade invitation. Only secure the paper in place when you are happy with the design.

There are many variations you can make with pastel shapes, and feel free to be creative. This homemade wedding invitation is a great way to utilize pastel colors for your spring wedding.

Watercolor

Another easy homemade wedding invitation that uses pastel colors is a watercolor painted invitation. For this homemade spring invitation you will need cardstock, water, a palette, water color paint, and a paintbrush. Start this pastel colored invitation by folding a piece of cardstock in half.

If you are using liquid watercolor paint apply paint directly to the palette. If you are using watercolor blocks, get them very wet and move some paint to your palette with the paintbrush. Then add some white paint to each color you are using to make the colors a pastel tint.

When all of your colors are ready use a clean paint brush to wet the front of the invitation lightly. Then drop the pastel paint onto the wet surface. Use your paintbrush to help the colors swirl together. Allow the invitation to dry, and it is ready for a handwritten greeting.

When creating pastel colored wedding invitations you can be very creative, and you do not have to stick with certain images or themes. You can simply use the pastel colors to represent your spring wedding. These homemade spring wedding invitations are easy to make, and they utilize pastel colors to the fullest; so try them for your homemade spring wedding invitations.

Garden Crafts: Wire Plant Stakes


Spring is here and garden crafters should be enthused! There are so many fun garden craft projects, and it is the perfect time to get crafty for your garden. Plant stakes add detail and intrigue to your garden while serving a necessary purpose. This article will provide you with detailed instructions on creating wire plant stake crafts for your garden.

Butterfly

Wire is the perfect medium for creating plant stakes for your garden, and you can make a lovely butterfly using wire. For this garden craft you will need wire, pliers, wire cutters, beads, and a metal or wooden garden stake.

Start this craft by cutting six pieces of wire using the wire cutters. The wire pieces should measure 9 inches, 6 inches, and 4 inches. Then add some beads to various parts of the two sets of longer wires. Twist all of the pieces of wire into spirals, but remember to leave a few inches at the end untwisted.

Then wrap the shortest pieces of wire around the top of the garden stake and leave the spirals facing outward to look like antenna. Add the longest pieces of wire below the antenna to be the top wings, and continue in the same fashion with the medium sized wire spiral.

Finish this garden stake craft by cutting another piece of wire and add four beads to it. Then lay the four beads along the top end of the garden stake to look like a body, and use the extra wire on the ends to secure the beads in place by wrapping the wire around the stake and the beads.

This easy wire garden stake craft is a fun way to help the plants in your garden while being crafty!

Sun

Another way to use wire to add a plant stake to your garden is by making a sun shaped plant stake. For this easy garden craft you will need wire, a garden stake, wire cutters, and pliers. You may also want to use something round to make a perfect circle. Start this craft by cutting a long piece of wire using the wire cutters.

Form a circle about 4 inches in diameter around and twist the excess wire to secure the circle in place. Then cut a very long piece of wire and use the pliers to curl the end into a U shape. Place the curve around the circle of wire and use the pliers to bend it shut tight. Wrap the wire around the circle one more time to secure it in place.

Then bend the wire about an inch away from the circle to make a point and wrap the wire back around the circle twice to secure it in place; this will make a sun ray. Continue around the circle until your sun is complete, and use the excess wire to attach it to the garden stake.

This easy garden craft is fun to make, and it will add a unique detail to your garden.

Wednesday, April 21, 2021

Beginner Jewelry Craft Projects for Mother's Day


Making jewelry craft projects for Mother's Day is easy even for beginners. Mother's will love receiving jewelry made especially for them. This article will explain how to make beginner jewelry craft projects for your mom on her special day.

Beaded Dangle Earrings

Earrings are easy to make and a perfect project for the beginner. To make this jewelry item you will need wire, a wire cutter, pliers, two jump rings, two medium sized beads, four small beads, and two earring hooks.

Start by cutting a piece of wire about two inches long. Then use the pliers to bend the bottom of the wire into a small circle. Add a small bead, medium bead, and another small bead to the wire. Then twist the other side of the wire to secure all of the beads in place and create another small circle.

Finally attach the earring post or hook using a jump ring. Simply stretch the ring open with the pliers, then add the circle on the end of the beaded wire and the earring hook. Close the jump ring with the pliers and repeat the process to make the other earring for the pair.

Beach Glass Bracelet

Another great beginner's jewelry project for Mother's Day is a beach glass bracelet. For this jewelry craft you will need some pretty beach glass beads, hemp or other thin cord, scissors, and a safety pin. Start by cutting 3 pieces of cord about a foot and a half long.

Then tie the cords together at the end to make a tight knot. Make a second knot slightly lower than the first knot; there should be enough room for a bead to slip past the two knots. Then start braiding the cords together. After a few links, add a bead to one strand of cord. Make another link and add another bead. Keep adding beads until you are almost done with the bracelet. Then add a few more braids and a final bead to the end of the bracelet. The final bead, when slipped through the knots on the other end, function as a clasp.

These beginner jewelry craft ideas make unique and pretty Mother's Day gifts. Make sure to buy custom beads to suit your mother's tastes, and your mom will be ecstatic to wear her new gifts.

Saturday, April 17, 2021

Spring Home Decorating Ideas Using Recycled Materials


Spring is a great season for bringing new life to your home decorating projects. Spring is fresh and fertile, and these ideas will show you how to use recycled materials in your spring themed home decorating projects.

Collage Photos

Flowers, birds, bunnies, plants, fruits, and vegetables are all spring images. Use old magazines to create collages to display on your wall. Cut out spring images and glue them to pieces of heavy paper. Then place the images inside old frames and hang them on different areas of the wall. You can use multiple images or you can use large pages with single images. This craft is great for adding style while recycling materials.

Plastic Lid Wall Hanging

Make a spring themed wall hanging using plastic lids, paint, paintbrushes, scissors, and ribbon. Start by painting all of the lids a solid color. Then decide on the message you want to write on your banner. Spring and bloom are good word choices for decorating during this season. Then paint each letter of your message on a different lid. Cut holes in the sides of each lid and use the ribbon to tie them together. Hang this project in your home for instant décor.

Dried Flower and Twig Candle Holders

Add that spring touch to your candles by placing them in these handmade holders. For this idea you will need twigs, ribbon, dried flowers, hot glue, and jars. Start by tying the ribbon around the lip of the jar and using the glue to secure it in place. Then glue some flowers and twigs to the ribbon to add more seasonal charm Candles complete the look.

Bird's Egg Centerpiece

For this centerpiece you will need grapevines or twigs. You will also need glue, eggs, a needle, paintbrushes, and paint. Start making the nest by wrapping the vines or the twigs together in a circle. Add more vines until the circle is smaller and the bottom is covered. Use glue along the way to secure it in place. Then use the needle to poke a small hole in the egg and blow out the contents. Finally paint the egg and place in the nest for your centerpiece.

These spring themed decorations are fun and easy to create. Try these ideas in your home decorating themes for spring, and you will love the results.

Friday, April 16, 2021

3 Fun Recycled T-Shirt Crafts


Everyone has t-shirts that they love but they no longer wear. Maybe you outgrew your favorite t-shirt, or maybe it got a hole in a very unflattering place; either way there are some awesome ways you can recycle your t-shirt to make it last many more years. There are several fun ways to reuse old t-shirts, and this article will inspire you to bust out your old shirts and get crafting.

My favorite simple t-shirt craft is the t-shirt pillow; it is easy and a great item you will use for years to come. All you will need for this project is an old t-shirt, needle, thread, scissors, and some stuffing. Now simply cut the sleeves of the shirt and the neck of the shirt so it makes a square. Next you will need to turn the shirt inside out, and thread your needle. Start sewing at the left or right side corner of the shirt where you cut the sleeve off. Continue sewing until you have sewn completely three sides around the square. Now sew half of the final side, and turn the square right side out. Fill the pillow with stuffing until it is a good density, and sew until the square is completely sealed. This project makes an awesome pillow out of a shirt you might have thrown away.

Another fun shirt project is a shirt purse. This project is easy, and it is a good way to recycle; all you will need is a shirt, scissors, and needle and thread. Simply turn the shirt inside out. Sew the top edge of the shirt, where your head would go, shut. Next cut the sleeves off of the shirt, and sew the holes shut. If this shirt is long sleeved this is helpful, but you can use short sleeved shirts as well. If the shirt has long sleeves you can use them as a strap; if not you can use a strong ribbon or piece of felt. Just sew the sleeve ends to the sides of the bottom of the shirt, and you have an awesome bag.

Another fun way to save a t-shirt that means a lot to you is making a t-shirt pot holder. For this project you will need a piece of felt, an old shirt, scissors, needle, and thread. Now simply cut out the part of the shirt you like. If there is a picture or a fun pocket cut out a square that is suitable for a pot holder. Next cut a piece of felt slightly bigger than the t-shirt piece. Now lay the shirt on top f the felt, and sew around all of the edges. Cut a small strip from the felt and sew it to one of the corners of the square. Now you have completed your potholder, and you have recycled one of your favorite shirts.

There are many ways to recycle things found around your home into fun and useful craft projects. I hope these ideas have helped you to reuse some of the items you might throw out.

Felt Fun Crafts: Hair Accessories


Felt is a great medium for many projects. It comes in a wide variety of colors, and you can even find felt that has patterns or glitter on it. Felt is a great medium because it is durable and does not need to be sewn on the edges to keep from fraying. Another reason felt is so awesome is that it is so cheap. A regular sized sheet of felt only costs about 30 cents and if you buy it in bulk it is even cheaper. Felt is a perfect fabric for creating hair accessories, and this article will give you detailed instructions on how to make several hair accessories with felt.

Felt flower headbands are a lot of fun to make and they are super easy. You will need a somewhat wide headband, various colored sheets of felt, a hot glue gun, scissors, and some beads. The beads are optional but they add a nice touch. To start cut various size circles out of the felt. Next fold then in half twice. Now cut small slivers out of each circle while it is still folded. Open up the circles and you have a wonderful daisy flower. Using the hot glue gun arrange these flowers on the head band in a design you like. Remember to overlap, and use two or three different sized circles on top of one another to add a twist. After all the flowers are glued add beads or gemstones to the centers for an even more stylish look.

Felt butterfly clips are easy to make. You will need for this project is various sheets of felt; the sturdier felt works well for this. A hot glue gun, a barrette or banana clip, and scissors are required as well. Now start by picking a color for the base of the butterfly. Cut a square out of this color and fold it in half. Using the scissors cut a v shape into all of the sides of the square except for the folded one. When you open it you will have butterfly wings. Now cut various size circles out of felt and add them to the wings as details. Cut a small circle and cylinder out of a darker felt and add this as the body. After the entire piece is glued together attach it to the clip.

Rainbow felt hair bands are really pretty, and this project is easy for smaller children to create. Start by cutting many long thin strips of different color felt. Now fold a long strip of felt in half. Hold the hair band in one hand and put the loop of the folded felt inside of it. Push the ends of the felt around the hair band and through the loop. Pull it tightly and continue with the rest of the felt strips until the hair band is full. This is a fun project, and you can use whatever colors you like.

Felt is a fun material to use for many craft projects. I hope these crafts have inspired you to use felt for your next project.


Wednesday, April 14, 2021

Fun Kid Crafts: Three Pinecone Crafts


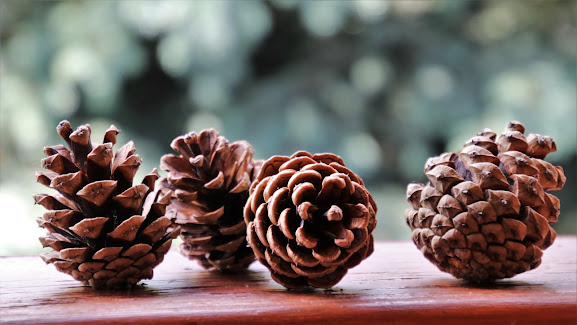
A pinecones is one of my favorite items to use for natural crafts. They are plentiful, and they come in various shapes and sizes. They can be used for many different craft projects, and this article will discuss three different craft projects that you can make using pine cones.

A pine cone angel is precious, and it only requires the use of pine cones, leaves, glue, a round bead, some silver or gold wire or ribbon, and paint. You can also use glitter for this project if you like. Simply paint the bead like a head. Paint a pretty little face on the bead and paint the cone the color of your angels dress. Now add some pretty details to the leaves because they will be your wings. Glue the wings behind the pine cone, and remember to glue them high enough to leave room to glue the head to the leaves. Now glue the head on, and add the wire or ribbon as a halo. Your angel will be a great addition to your nature crafts

Pine cone fire starters are a simple and fun project that only requires a microwave, old wax from used candles or broken crayons, and newspaper. Simply melt the wax or crayons in the microwave starting with 30 seconds and ending when the wax is almost completely melted. Now dip the pine cones in the wax and let them rest to dry on the newspaper. These pine cones will help start any fire, just throw them in and light them. Remember you can mix crayons with the wax as well to add some fun colors.

Pine cone Christmas trees are a lot of fun to make and they are great Christmas ornaments. All you will need for this project is some pine cones, a bottle cap, paint, glue, and some beads or flowers. Glitter is also fun for this project, but it is optional. Simply paint the pine cones green, paint the cap silver or red, and glue these two pieces together. You will have your basic tree. Now you can embellish it using beads, silk flowers, and glitter. This project is a great gift that children can make during the holiday season.

Pine cones are everywhere, and they are inexpensive if you live in a place that does not have pine cones. They are great for crafts because they are so cheap, and it is fun to collect them with kids in order to complete your crafts projects. I hope you have enjoyed these projects, and have fun crafting!

4 Cheap and Awesome DIY Gifts for Kids


Buying gifts for kids these days can be a hassle. There are always product recalls and most of the time toys are over priced and can be out of stock. Why not make your own gifts this year? Homemade gifts are personal and can be customized to suit the recipient perfectly. Here are some inexpensive and great gifts you can make for kids right in your home.

Crayons are always a great gift for kids, and I have never met a kid who didn't love crayons. You can make awesome rainbow crazy crayons using crayon remnants for little or no money. Simply gather broken bits of crayons that have been left over and cupcake pans. If you have paper or foil muffin cups that is good, but oil will work just as well. Lightly oil the cupcake pans or fill them with muffin cups, and add the crayon pieces until the cup is about an inch or so full and bake in the oven at 350 degrees. It will only take a few minutes and when they are cool you can pull them right out.

Another great kid's gift is the keepsake box. Find a nice durable box like a cigar box or something similar. Next cut out pictures of things that your kid is interested in and glue them to the box in a nice arraignment. Now cover the box with a sealer or modge podge and allow to dry. This box will be there special box for keeping all of their little treasures. Before you give them this present remember to include a special little item to start their collection.

Homemade play dough is another kid's gift that is fun, easy, and cheap to make. You can make this dough by simply using 2 and a quarter cups of cornstarch, 2 cups of baking soda, and 1 and a quarter cup of cold water. Add the water to the dry ingredients while whisking. Heat the mix until it becomes thicker than pancake batter. Next put dough on a plate and cover with a wet cloth. After it is cool you must knead it. This dough will last a while. You can add color to the water before making dough for fun if you like.

Another fun gift that will get kids to take a bath more often is the treasure soap. Find a cool little present at a local dollar store such as a plastic figure or a fancy ring. Next buy some premade soap base or use soap scraps that you have at home, and melt them down. You can use a cupcake pan or small Tupperware container as a mold for this soap. Fill it with wax paper and pour a small layer of melted soap and let it cool for a little while. Next add the toy and cover it with soap. These surprise soaps are fun and creative.

There are many fun gifts that you can make yourself for kids. You do not have to spend a lot of money on presents for children. These projects will make your gifts more personalized and special.

April Bulletin Board Ideas for Preschool


Preschool kids love creating projects for the bulletin board, and these April themed ideas are fun for the entire class. April has a lot of holidays to choose from when designing the bulletin board. This article discusses April bulletin board ideas that are great for preschool.

Arbor Day Hand Print Tree

Arbor Day is a holiday to remember in April. Preschool kids will love this bulletin board idea. You will need green paint, paper plates, brown paper, scissors, and butcher paper. Start by covering the bulletin board with the paper.

Pour paint onto each plate and help kids press their hands into the paint. Then they can press their wet hands onto the brown paper. Help kids cut out their handprints after the paint has dried. Make a tree trunk for the leaves using the brown paper. Add the hand prints to the tree to finish this April themed bulletin board in remembrance of Arbor Day.

Umbrellas

Another April bulletin board idea is umbrellas. You will need blue butcher paper, white oak tag, construction paper, scissors, pencils, and umbrella shaped cut outs. You can also use coloring pages that feature an umbrella is you like. Markers or crayons are also needed to color the umbrellas with.

For this bulletin board kids should color the umbrellas and right their names on them. Allow the preschool kids to personalize their umbrellas to their liking. While they are working on their part cover the bulletin board with the butcher paper.

Then use the oak tag to create a large rain cloud. Use the markers to write the name of the class on the rain cloud. Then cut out raindrops from the construction paper. Add the rain drops and the cloud to the center of the bulletin board.

Help kids attach their umbrellas to the April themed bulletin board and your preschool kids will enjoy displaying their work.

Creating bulletin boards with preschool kids is fun for them; it also helps improve their confidence and motor skills. Try these fun bulletin board ideas with your preschool students this year, and you are guaranteed to have a bulletin board you can be proud of.

Mother's Day Crafts for Preschoolers with Pompoms and Pipe Cleaners


Making Mother's Day crafts with preschoolers is fun and easy with pompoms and pipe cleaners. You can buy pompoms and pipe cleaners inexpensively and at many local dollar and craft stores. This article will provide you with detailed instructions on pipe cleaner and pompom craft ideas preschoolers will love making for Mother's Day.

Flower Bouquet and Vase

A flower bouquet and vase is an easy and special gift for Mother's Day. For this craft you will need pipe cleaners, pompoms, craft glue, a can, a hot glue gun, hot glue sticks, scissors, and green construction paper.

Start by helping preschoolers twist two green pipe cleaners together to create stems. Then help preschoolers add the pompoms to the ends of the stems using the hot glue. To complete the flowers help kids cut diamond shapes out of the construction paper and glue them to the stems like leaves.

Preschoolers can create a lovely vase to go with the flower bouquet for Mother's Day. For this part of the project let kids add glue to each pipe cleaner. This will be messy, so place a sheet of paper under the can before you let your preschooler get to work. Then help kids attach the pipe cleaner to the can by wrapping it around the outside of the can. Continue adding pipe cleaners until the entire can is covered. When the glue has dried add the flowers for a beautiful gift.

Picture Frame

A picture frame is a great Mother's Day gift that preschoolers can make. For this craft project you will need cardboard, scissors, pompoms, pipe cleaners, glue, and yarn. You will also need a photo of your preschooler to put in the picture frame.

Start by cutting a large square out of a piece of cardboard. Then cut a smaller square out of the middle to make the frame. Let kids decorate the frame with the pipe cleaners and pompoms in any way they would like. You can also add glitter and beads for a sparkly look. When the frame is done place a special picture in it for Mother's Day. Simply tape the picture to the back and glue some ribbon to hang the photo frame with.

These crafts are easy enough for preschoolers to make for their moms on Mother's Day, and they use inexpensive and fun materials that kids will enjoy. Try these craft projects with your child, and the lucky mom will love her presents.

Monday, April 12, 2021

Three Quick, Natural and Easy Beauty Tips for Your Hair


I have been reading the ingredient lists on the back of many products lately, and I have to say I am appalled. There are so many ingredients, and I can't even pronounce half of them. I have to admit that this makes me kind of nervous. I am especially nervous when I am consuming these products in one way or another. If you are like me you would prefer to go the natural way, and here are some tips that will help you achieve quick, natural and easy beauty for your hair.

Most people don't know that a natural shampoo for your hair is right in their kitchen cabinet. Baking Soda is a natural exfoliant and grease absorber. It is also a powerful cleaning agent. In order to omit store bought shampoo from our life simply mix about 3 tablespoons of baking soda with equal amounts of water. This will form a fine paste; rub the paste onto your scalp in circular motions like you would with shampoo. Now rinse this out and your hair will feel cleaner than usual.

Another interesting natural hair product that is in you kitchen is apple cider vinegar. This product can be used as a conditioner, and it doesn't have fifty ingredients. All you need to know to use this product is the right mixture. I use 3 tablespoons of vinegar to 2 cups of water. This solution should be applied and left alone for 3 minutes; then it should be rinsed like you would normally rinse conditioner. Apple Cider Vinegar is great because it increase luster and shine, and it leaves hair extremely smooth and soft.

Some people may think putting tea in your hair seems strange, but it actually is a great product for your hair. Chamomile makes hair soft and smooth, and it takes the junk from other products or the air around you out of your hair. I use about 4 teabags to a quart of water. I bring the water to a boil, and I add the tea bags. I will let this tea steep for about 20 minutes. Next I will spray the tea all over my hair and I will pull it up. I will then wrap a warm, damp towel around my head and rest for 30 minutes. This allows time for the tea to set in. Simply rinse your hair, and you will be on your way to lovely locks.

Your hair can be amazing without all the chemicals. I hope these natural hair recipes have helped you!

Thursday, July 21, 2016

Printable Bookmark Coloring Page book mark adult instant...


Printable Bookmark Coloring Page book mark adult instant download digital diy art therapy stress colouring jpeg book lover gift sheet 7


from Tumblr http://ift.tt/2ayIJcc
via IFTTT

Friday, May 29, 2015

Easy Freeze Ahead Veggie Breakfast Burrito Recipe Awesome!


Loving make ahead and freeze meals. While making omelets for dinner about a month ago I decided to experiment with a freeze ahead veggie breakfast burrito recipe inspired by a frozen quesadilla recipe from Slender Kitchen. I finally got around to heating it up and testing it out and it was amazing! Frozen for a month and still delicious. The burrito in the photo is the second burrito at 2 months frozen. I defrosted it and pan fried it, paired with some homemade guacamole and sweet potato fries. Yum!

Here is my recipe and check out the original recipe that inspired me from Slender Kitchen 

Freeze Ahead Veggie Breakfast Burritos
4 servings

Ingredients
5 large eggs
2 tablespoons milk
1/3 cup of left over stir fry veggies and onions
1/3 cup black beans drained well
1/3 cup corn drained well
4 slices american cheese
salt, pepper, garlic to taste
4 tortillas
Instructions

Scramble up the eggs and milk with salt, pepper, and/or garlic. Since I used left over veggies I didn't need to cook them, but I think frozen veggies would work fine if you defrosted them and patted them with some paper towel to dry out.

Break up the cheese slices and mix up the eggs, veggies, beans, corn, and cheese. Spread in the tortillas and roll em up. Put them in a freezer bag and remember to mark the date and recipe for easy future reference.

These burritos cooked up really well and can be microwaved, baked, or defrosted and pan fried.

To bake simply wrap in foil and bake at 350 degrees for 15 minutes, then flip it and leave the foil open to crisp up the outside for another 15 minutes.   Let them cool for about 5 minutes before digging in.


Wednesday, April 22, 2015

Lucy-Wonderland: multipocket

Lucy-Wonderland: multipocket:

Check out this awesome multipocket divider tutorial. Awesome!


from Tumblr http://ift.tt/1EtkWGD
via IFTTT

Friday, April 17, 2015

Have it all Step 1 - The Life Planner Binder

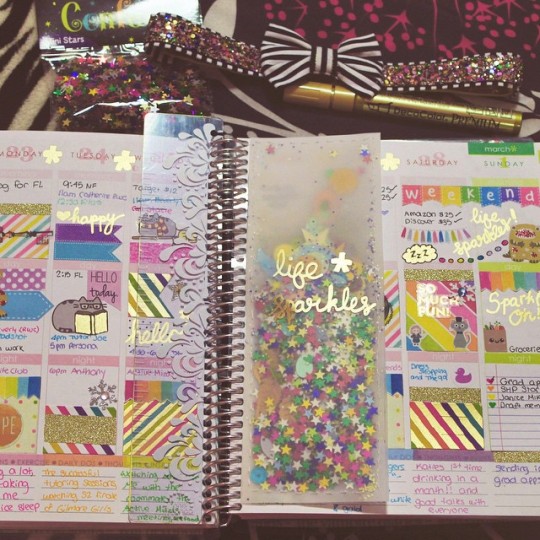
Ok so we all know the most important part of any plan is the plan itself, and if you want to have it all in life, that means having your cake and eating it too, then you need a good plan to start. So after years of working and working and feeling like there was no end to to the vicious cycle I finally created a life planner, and to my surprise not only has it made me happier and more efficient it is a lot of fun too.  I have to shout out to Alaina Leary for the inspiration I took one look at this confetti vellum page marker and was totally inspired. Check out her work and the tutorial at this link

https://alainaleary.wordpress.com/2015/03/03/do-it-yourself-confetti-business-cards-thank-yous-bookmarks/


Ok so with no further ado here are some pics of my planner


Isn't it so cute! It is actually an American girl doll binder I got on clearance for about $3 at the craft store. It came with a couple pretty patterned divider pages and 2 clear sleeves.  


This is a little in case of emergency note.

Here is an awesome pen slash tool holder I made with some elastic cord, cardboard, fabric scraps, and a glue gun. I am making 2 more for my niece and nephew shortly so I will post a tutorial and link here soon!

This shows the back of the pen holder, and an awesome multi-pocket divider, organizer for keeping all my stickers, scrap paper, and such. It was pretty easy to make using stickers, glue, old folders, and cardstock. Check back for instructions!

the back of the multipocket divider. I love the long pockets and the space to keep my mini sticky notepad. The blue patterned divider came with the binder. So cute!

Here is a look at my daily to do list. It is crazy, but I like to keep a spot for positive and not so positive outcomes. I a working with highlighters and started using number stickers trying to figure out all the random things I have to do everyday. I list work projects, some home stuff, happy stuff, and any other obligations or important things.

  
Here is what it looks like empty. I will be posting a downloadable link shortly if anyone is interested in printing it out. It could be prettier, but I would rather color on my pages than use the colored ink.

Ok so one of my biggest challenges is organizing, decluttering, and maintaining my house. It is crazy, crazier than possibly imagine. I mean I am not fit for a hoarding reality tv show, but a couple more years of living this way and I just might be. So this is my basic daily, weekly, monthly house cleaning list. You can find the original printable version of the daily cleaning planner page from Shemakesahome at this link; I switched it up to suit me, but that is the fun part. Love it!


I made this up real quick in photoshop. It is a fun meal planner so I can try to eat better and more creatively. Or at least be aware of when I am eating too much junk =)

A simple cardboard divider. I plan on filling it with quotes. 


My basic shopping list for my business. One of my main time saving goals lately is trying to go shopping as little as possible and always being aware of what I need has saved me trips and time. I also have a bill list to make sure I am keeping that on track here. 

This is a fun page where I set monthly goals, happy thoughts, things I want to try, and random monthly goals.  


Blank goals page

I make arts and crafts, costuming pieces, jewelry, and assorted pretty things so I am constantly updating my order lists. This is my basic work order list where I breakdown all the different orders I have to make and organize them by type of item and date. I also keep a little section for rush orders. It is so handy to have this all the time, and I use labels to add more orders if I don't feel like using a new page. Super handy! 

This is a fun little page for any ideas or inspirations. 

Here are those clear sleeves with a handy quick reference calendar and an awesome drawing from my nephew. 


I love my planner/binder. Still not 100% sure what to call it, but awesomeness. I will update with links to tutorials and printable pages for everything you see here shortly. Feel free to ask any questions, comment, or link to pics of your planner. I am off to cross "blog about planner" off my to do list!

Wednesday, July 9, 2014

Tips on How to Make Inexpensive Homemade Wedding Favors

Weddings are that special day where everything from the flowers to your shoes has to be just right, and all of the little details can start to add up to a number a lot higher than your budget. Are many things one can do in order to lessen the cost of their wedding. Here is a list of inexpensive wedding favors you can make in the comfort of your own home.

Chocolate dipped marshmallows are another budget friendly option for your wedding. Simply melt some chocolate chips in a microwave for a few sections and stir to make smooth. Stick marshmallows on lollipop sticks and dip and roll in the chocolate. Then roll the marshmallow in sprinkles or cookie crumbles. Allow to dry and put in small cellophane bags tied with ribbon. 

Another easy and inexpensive wedding favor can be made right in your kitchen. The ingredients you will need are Jordan almonds, dried fruit such as apricots and cranberries, a couple yards of netting, and ribbons with the couples names and wedding date printed on them. Mix the ingredients together and cut the tool into squares. Fill the squares, bunch up the netting and tie it with the ribbons. You can add candies or chocolates to these favors, and you can also tie little flowers around the favors if you like.
A very unique and inexpensive favor can be made for weddings happening in the spring or fall. For fall weddings all you need is some flower bulbs, ribbon, fake flowers, and squares of netting. Place a couple of bulbs in the squares of netting and tie them up with the ribbons and flowers. Another good idea is filling the netting squares with flower seed packets. These favors are frugal, and when planted your wedding will be remembered for a long time to come.
Weddings are wonderful events that should be cherished for years to come, and it can be celebrated in a way that is not expensive but still perfect with these little tips!

written by Sarah Ganly

Friday, April 12, 2013

DIY Wedding Invitation Kits

So you know I am always on the look out for new and interesting wedding ideas, and DIY is always right up my alley, so when I saw these DIY wedding invitation kits I automatically had to check it out.

On first glance I thought oh I get it; these are like the printable cards you can get from the craft store, but when I read the description I knew I was wrong. The kits include a ton of stuff that I would have never even thought about, but I would obviously need. The kits include all the items you would need to make your own personalized wedding invitations and at a fraction of the price of buying all the pieces separately.

All you need to do is fill in your info and print the cards out! So simple and much more affordable then getting them professionally made. The best part is they will look as good as store made invitations and you can have the satisfaction of creating them yourself!

DIY wedding invitation kits are fun and easy, and I recommend them to all brides. They are also a great project for anyone who is eager to help out!

These are some of my favorite DIY kits from http://www.thankyou.on.ca.


I love this one the classic black and white scroll-work is gorgeous!


The addition of the ribbon and embellishment flower make this invitation so sweet and romantic!

I love the raised daisy flower detail of these invitations. Simple and delicate. 

DIY wedding invitation kits are a great way to add your personal touch to your wedding while saving some money! I hope you all love these  kits as much s I do! Remember to check out http://www.thankyou.on.ca for more wedding invitation kits you can make yourself as well as a ton of other great wedding items! And as always check back for more wedding and craft reviews, articles, pictures, and ideas! 


Monday, April 8, 2013

Homemade Wedding Decorations: Spring Butterflies


Spring is a lovely season for weddings, and this season should be incorporated into wedding decorations. Butterflies first make their appearance during the spring, and they are the perfect theme for spring wedding. This article will provide you with detailed instructions on creating three homemade wedding decorations with spring butterflies as the theme.

Many of these projects use a butterfly template. Please check this post for a bunch of free buttterfly templates.

Garland
A butterfly garland is a lovely spring wedding decoration, and this homemade spring craft can be made easily and quickly. For this homemade spring wedding decoration you will need coffee filters, watercolor paints, a paintbrush, water, pipe cleaners, scissors, and ribbon.
Start this homemade spring wedding decoration by wetting all of the coffee filters and the paint. Add some drops of paint to the filters and the colors will swirl together. Allow the coffee filters to dry completely.
Then fold a pipe cleaner in half and pinch the coffee filter in the middle. Place the folded end of the pipe cleaner on top of the pinched section of the coffee filter and pull the ends through. Wrap the pipe cleaner around itself until you reach the other side of coffee filter and curl the ends of the pipe cleaner to make the butterflies antennae. Cut a long piece of ribbon and hook the butterflies on to the ribbon by their antennae. This homemade spring wedding decoration is easy to complete and it will look lovely on your big day.
Centerpiece
Butterflies make a beautiful spring wedding centerpiece; for this homemade decoration you will need a butterfly template, cardstock in various spring patterns, scissors, glue, fishing line, a clear vase, flowers, and a tree branch. You can use fake flowers for this craft if you like.
Start this homemade wedding decoration by tracing the butterfly template onto the cardstock. You can make a butterfly template easily by finding an image of a butterfly and cutting it out of cardboard. Next cut out several butterflies and glue pieces of fishing line to the backs of the butterflies.
After the glue has dried tie the butterflies to the tree branch so they dangle nicely and fill the vase with flowers. Place the branch across or on top of the vase, and add a little glue to secure it if you like. This homemade spring butterfly decoration will look lovely as a wedding centerpiece.
Place Card Holder
You can make beautiful butterfly place card holders for your homemade wedding decorations. For this wedding craft you will need a butterfly template, scissors, patterned cardstock, a pencil, glue, and a black marker. Start this craft by tracing the template onto the cardstock, cut the butterflies out, and color the bodies and antennae black.
Next lightly bend the butterflies in the middle so the wings are closer together. Add a line of glue halfway up the body of the butterflies and attach two butterflies together. Make sure to leave a space in between the butterflies on top to place the name card. This spring wedding decoration uses butterflies in a creative and fun way.
Spring is a wonderful season for weddings, and it is a lot of fun to incorporate butterflies into your homemade wedding decorations. These homemade wedding decorations feature spring butterflies, and they will make your wedding unique and lovely.


Monday, April 1, 2013

Kaizen by Xubrnt Drawn on Life; A Bag Inspired by Life and Catered to Your Needs


Kaizen is a unique product that I would like all my friends and fans out there to check out and help raise funds for. The literal Japanese translation of kaizen is "change for the better" and this bag truly is. It is a wonderful product being created by Xubrnt and she is currently raising funds for a sewing machine she will need for the project.


Kaizen is a unique type of bag created from mini diamond ripstop poly/nylon which is durable and affordable! The bag comes in a variety of colors, and it "will hold your plastic, money, love notes, receipts, chapstick, and your keys with the attached split key ring, that can hang from your belt loop, back pack, or inside your purse". 


Check out this video to find out more! And remember to visit this page to help raise funds and receive something awesome in return. 

Check out this page to find out more about Xubrnt


Saturday, November 12, 2011

Homemade Green Thanksgiving Day Invitations You Can Make for Free

Thanksgiving is a special holiday that reminds us to give thanks; there is no better way give thanks to Mother Nature then by using things you would normally throw away or find in nature to create homemade green Thanksgiving Day invitations. This article will give you step-by-step instructions on creating three homemade green Thanksgiving Day invitations for free.
Fall Foliage Invitation
Fall foliage is a great medium that is free for making homemade Thanksgiving Day invitations. You will need dried leaves; it is nice to find leaves when they are not completely dried out and press them in a book. You will also need glue, old cardboard, white paint, and a marker for this homemade, green, and free Thanksgiving Day invitation craft.
Simply cut the cardboard into a card size you like, and paint one side. Allow this part to dry, and sponge paint the outside to look like snow. The next step in this free Thanksgiving Day invitation is to glue the leaves flat to the front of the card and write a nice message on it. This green homemade Christmas invitation uses things you probably have lying around your home so it will cost you next to nothing, and free crafts are the best.
Pine Cone Flower Invitations
This free green Thanksgiving Day invitation idea is easy, elegant, and homemade. You will need a few pinecones, a pair of strong scissors or clippers, glue, a few beads or buttons, paper, and a green marker. This homemade green Thanksgiving Day invitation is virtually free.
Start by clipping individual petals off of the pine cone. Arrange these pieces into flower shapes, and glue them to the card; add the beads to the center of the flowers for the inside. Add leaves and stem using the marker, and it will add to the style you can turn them into a spiral border around the card. Add a nice message to the card with the marker, and you will have a lovely homemade Christmas card that is green and free.
Thanksgiving Day Collage Invitation
For this free homemade Thanksgiving Day craft you will need old magazines, paper, glue, and a marker. Start by cutting several images that remind you of what you are thankful for out of the magazines. Arrange these images onto the invitations and glue them in place. This is a fun and sentimental invitation craft because you can customize the images you use for the person who is receiving the homemade Thanksgiving invitation. Write a thoughtful message that conveys your thanks on the card, and everyone will enjoy these green homemade Thanksgiving Day invitations that you have made for free.
Making your own homemade Thanksgiving Day invitations using free and green methods is a positive way to spend your time crafting. Try these homemade Thanksgiving Day invitations ideas, and you will be proud of your green and free methods.

Gishmas 2021 List

 Day 1 Challenge: December 20th – Image or Video What powers GISH? Love, actually. So, let’s spread some cheer. Using the GISH App or search...