Showing posts with label craft. Show all posts

Saturday, June 5, 2021

How to Make Polymer Clay Daisy Pendants


Polymer clay is one of my favorite materials to use for everything. It is cheap, easy to use, and it bakes hard right in your oven in no time. There are so many fun things you can make with polymer clay, and this article will describe how to make a daisy flower pendant using polymer clay and a little imagination.

The simplest flower pendant you can make using polymer clay is a daisy. To make this flower you will need white, yellow, and green clay; you will also need a wooden skewer or knitting needle, a pin, and a knife. This project is easy, and children of many ages can complete it with adult supervision.

Now start by making a small orange ball for the inside of the flower. Now make several small white balls that are about the same size of the orange ball. Now roll those balls into tube like shapes, and press them slightly flat. Pinch one end of these white petals and press them onto the orange base. When all the petals are attached use the pin to poke some small holes into the orange ball; this will give the flower a more realistic look.

Use a small tube of green clay to make a circle around the skewer. Next take one or two small green balls and press them slightly flat. Now pinch both sides of the green shapes so they resemble leaves or a diamond shape. Using the knife cut an indented line down the middle of each leaf, and push them onto the green circle.

Next use the knife to cut some light lines in the green ring where you will be attaching the flower head. If you have some liquid sculpt you should add some to the lines you have made. Press the flower head gently on these lines until it sticks. Bake in the oven at the specified degrees for about 15 minutes. Make sure to check the flower so it does not cook to long.

Remove the flower and let cool for about half an hour before you remove the skewer. Be gentle because you do not want to break the base. Simply string the pendant on some ribbon or a nice chain, and it is ready to wear.

If you would like to add some special details to this pendant you can use acrylic paint after the pendant has been baked and cooled. To add some pretty color to the petals brush a little paint onto the inside of the petals and brush a little pigment powder on the centers after the paint is almost dry. You can also add some glitter to the edges for fun. These pendants are a lot of fun to make, and they can be personalized to suit anyone's tastes.

Sunday, May 23, 2021

How to Make Miniature Dishware for Dollhouses


Dollhouses need dishes. What would a doll do without a pitcher and some cups? What would a doll eat off of without plates? Dolls need the basic kitchen utensils too; so I have compiled some simple instructions on how to make some basic kitchen utilities.

Plates are easy and fun to make. You can make plates out of cardstock or out of clay. Both require the use of a quarter. To make paper plates trace a circle slightly bigger than the quarter on the paper and cut it out. Next place the paper on top of the quarter and center it. Push down the edges of the paper with your finger and run the wrong end of a pen around the edge of the quarter to make crease. In order to make clay plates cut out a circle of cardstock the size of the quarter and a size slightly bigger than the quarter. Now glue both papers together with the circle centered. Next flatten a ball of clay and press it onto the circle with the small circle in. Trim the edges so that the clay matches the paper. Bake like this and remove paper when it is cooled.

Next you can make cups using simply clay and a colored pencil, and you can also make paper cups for barbecues and dollhouse parties. Roll a piece of clay into a ball and push the pencil into it; next push it on a hard surface so the bottom is flat. Roll a little tube of the same clay for a handle and attach it to the side of the mug; you can twist one end to create a unique handle. Bake with the pencil inside, and pop it off the pencil when it is slightly cooled. You can also make paper cups buy simply cutting strips of paper and rolling then into a tube. Next cut a circle slightly larger than the opening of the tube and push it into the bottom of the cup. Remember to glue this so it does not pop out.

The last most important part of making this place setting is the pitcher. To make the pitcher take a medium size ball of clay and a wooden dowel, a thick marker, or some other item that can create the hollow body of a pitcher. Now push the dowel into the ball of clay and press the bottom down on a hard surface to flatten it. Next add a handle to the pitcher. Now take a skewer or dull tipped needle and push it into the top of the pitcher where it is opposite of the handle. Pull the clay outward gently in order to create a spout. This will give the clay enough play to be pulled off of the dowel and baked standing up.

I hope you enjoy all of these fun dollhouse projects and remember to play!

Friday, April 23, 2021

3 DIY Kitchen Window Treatments


Adding a nice window treatment to your kitchen can really brighten up the mood, and it is easy and fun to do on your own. Making your own kitchen window treatment can be inexpensive as well as personal. Here are three methods for making your own perfect window treatment.

For a thrifty and resourceful kitchen curtain simply pick out two kitchen dish towels that are long enough and wide enough to cover your window. Next find a think piece of ribbon that matches your towels and your kitchen. Fold the ribbon in half and attach it to the towel on the top. This will create a pocket to stick a curtain rod through. You can sew the folded ribbon to the towel or you can glue it. The hem tape that you iron to activate also works well for this project. You can add fake flowers, more ribbon, buttons, or other embellishments to the curtains if you like. Finally string the curtains on the rods and hang.

Another fun and unique kitchen window treatment requires the use of scarves. You can use several pretty scarves, or you can simply use one. If you are using one scarf you can fold it to make a triangle and hang the corners through the hooks for the curtain rod. If you have a couple more scraves that are long braid or twist them together in the middle and drape around the window. Let the ends hang loose for a dramatic effect.

For a very personal and attractive look utilizes handkerchiefs or bandanas. You can use many different colors and patterns to make this window treatment even more exciting. Simply tie the end of each handkerchief around a curtain hook and string onto the curtain rod. For another neat handkerchief look fold the handkerchief into a triangle and tie one end of a handkerchief to a curtain hook. Next tie the other end to another curtain hook, but also tie the end of another folded handkerchief to that hook. Continue until you make a chain slightly bigger than your window. Finally finish the window treatment by stringing the hooks onto the curtain rod and hanging it.

Creating a fresh look in your kitchen is as simple as creating your own custom window treatment, and these three ideas will help you get started on renewing your kitchens appeal. The techniques you have learned here will inspire and delight you and your kitchen guests for long to come. So go get crafty!

Magic Wands: Fun Projects for Boys and Girls


Kids love magic wands; whether they are pretending to be wizards or they are pretending to be princesses, they need a magic wand. There are many items you can find around the house that can be easily turned into a magic wand, and this article will describe two different magic wand craft projects that are fun for children of all ages.

If you live in a wooded area, or there are some trees near your house, your best bet for making a wand is starting out with a nice stick. A nice stick can be found in many places in nature, and this is a fun project in itself.

After you have found this stick imply strip the bark off, and let it dry for a couple of days. Next you will need some leather or pretty ribbon or cord. You will also need some paint, feathers, and beads. A large bouncy ball is also a fun way to add detail to your wand, and a hot glue gun makes this project a lot easier.

If you have a large bouncy ball you can glue it to the top of your wand. Have your child paint the wand, and the ball. Next wrap the wand with the leather cord, and tie the ends tight. Remember to leave some extra cord to tie feathers to. Glue beads around the wand and to the top of the ball, and you have a great wizard wand.

Another fun and easy wand to make is a fairy wand. For this project you will need scissors, ribbon, a hot glue gun, glue sticks, and a bouquet of fake flowers or a fake flower with a long stem. You can also use extra fake flowers, beads, feathers, and glitter is you like.

If you are starting with a bouquet of flowers pull all of the flowers and leaves off of the stems except for one flower. Now twist the stems around the stem that still has a flower. The stems are usually made with wire so this should be easy. If you are starting with a long stemmed flower you are already almost done. Now using the glue wrap the ribbon around the stems starting from the top where the flower is. Glue the end of the ribbon well, and make sure to glue the ribbon in a couple of other spots along the way.

Next glue some more flowers, beads, and glitter around the top of the wand, and tie some extra short ribbons around the top in a bow. This craft is a lot of fun, and it can be personalized.

How to Make a Mermaid Wedding Crown or Tiara


You can learn how to make a mermaid wedding tiara or crown with these detailed instructions. Mermaid and beach themed weddings are always popular and fun. Making a homemade wedding crown is a great addition to your wedding. This article will supply you with the details needed in order to make a mermaid wedding crown for your wedding.

To make a mermaid wedding crown you will need vines, wire, sea shells, clear or iridescent marbles, blue sequins, scissors, blue glass beads, sparkle powder or dust, a hot glue gun, hot glue sticks, and pearls. The first step to making a mermaid wedding crown is making the base.

If you are going to make it a full crown you will need to start by wrapping the vines into a circle. If they need extra support you can secure the mermaid crown with wire. If you are making a have crown or tiara the process is a little more time consuming. You will also need string and a bowl full of water.

Start by cutting the vines the length you will need for your crown or tiara. Then wrap or twist them together to form a solid bundle. Secure the ends together by wrapping the wire around it several times. Remember to pull the wire tight and twist in between wraps.

Next tie the string around the end of the bundle in a tight knot. Then bend the bundle to make a U shape of a crown. Tie the string around the other side of the bundle in a tight bow. Remember if you can not bend the bundle the entire way it is alright. Bend it until it starts to feel like it might break and tie the bow.

Place the crown or tiara in the bowl of water and leave it for an hour. Then untie the bow and bend the crown more. Continue with this process until the perfect tiara shape is made. When you have reached this point let the tiara soak another hour. After an hour you can remove it from the water. Allow the crown to dry completely before adding the details.

Now add the special mermaid details to this crown by starting with the sea shells. Glue 3 large shells to the front of the crown to create height. Then add beads, more smaller shells, pearls, and marbles to the mermaid crown. Next take a sequin and glue it to the center of the middle seashell. After it has dried add a marble on top of the sequin. Add the sparkles to the crown at the end to fill in areas and cover up glue that is already in place.

This homemade mermaid wedding crown is a special touch that you deserve for your wedding. It is one of a kind and a beautiful addition to your wardrobe.

Saturday, April 17, 2021

Spring Home Decorating Ideas Using Recycled Materials


Spring is a great season for bringing new life to your home decorating projects. Spring is fresh and fertile, and these ideas will show you how to use recycled materials in your spring themed home decorating projects.

Collage Photos

Flowers, birds, bunnies, plants, fruits, and vegetables are all spring images. Use old magazines to create collages to display on your wall. Cut out spring images and glue them to pieces of heavy paper. Then place the images inside old frames and hang them on different areas of the wall. You can use multiple images or you can use large pages with single images. This craft is great for adding style while recycling materials.

Plastic Lid Wall Hanging

Make a spring themed wall hanging using plastic lids, paint, paintbrushes, scissors, and ribbon. Start by painting all of the lids a solid color. Then decide on the message you want to write on your banner. Spring and bloom are good word choices for decorating during this season. Then paint each letter of your message on a different lid. Cut holes in the sides of each lid and use the ribbon to tie them together. Hang this project in your home for instant décor.

Dried Flower and Twig Candle Holders

Add that spring touch to your candles by placing them in these handmade holders. For this idea you will need twigs, ribbon, dried flowers, hot glue, and jars. Start by tying the ribbon around the lip of the jar and using the glue to secure it in place. Then glue some flowers and twigs to the ribbon to add more seasonal charm Candles complete the look.

Bird's Egg Centerpiece

For this centerpiece you will need grapevines or twigs. You will also need glue, eggs, a needle, paintbrushes, and paint. Start making the nest by wrapping the vines or the twigs together in a circle. Add more vines until the circle is smaller and the bottom is covered. Use glue along the way to secure it in place. Then use the needle to poke a small hole in the egg and blow out the contents. Finally paint the egg and place in the nest for your centerpiece.

These spring themed decorations are fun and easy to create. Try these ideas in your home decorating themes for spring, and you will love the results.

Friday, April 16, 2021

3 Fun Recycled T-Shirt Crafts


Everyone has t-shirts that they love but they no longer wear. Maybe you outgrew your favorite t-shirt, or maybe it got a hole in a very unflattering place; either way there are some awesome ways you can recycle your t-shirt to make it last many more years. There are several fun ways to reuse old t-shirts, and this article will inspire you to bust out your old shirts and get crafting.

My favorite simple t-shirt craft is the t-shirt pillow; it is easy and a great item you will use for years to come. All you will need for this project is an old t-shirt, needle, thread, scissors, and some stuffing. Now simply cut the sleeves of the shirt and the neck of the shirt so it makes a square. Next you will need to turn the shirt inside out, and thread your needle. Start sewing at the left or right side corner of the shirt where you cut the sleeve off. Continue sewing until you have sewn completely three sides around the square. Now sew half of the final side, and turn the square right side out. Fill the pillow with stuffing until it is a good density, and sew until the square is completely sealed. This project makes an awesome pillow out of a shirt you might have thrown away.

Another fun shirt project is a shirt purse. This project is easy, and it is a good way to recycle; all you will need is a shirt, scissors, and needle and thread. Simply turn the shirt inside out. Sew the top edge of the shirt, where your head would go, shut. Next cut the sleeves off of the shirt, and sew the holes shut. If this shirt is long sleeved this is helpful, but you can use short sleeved shirts as well. If the shirt has long sleeves you can use them as a strap; if not you can use a strong ribbon or piece of felt. Just sew the sleeve ends to the sides of the bottom of the shirt, and you have an awesome bag.

Another fun way to save a t-shirt that means a lot to you is making a t-shirt pot holder. For this project you will need a piece of felt, an old shirt, scissors, needle, and thread. Now simply cut out the part of the shirt you like. If there is a picture or a fun pocket cut out a square that is suitable for a pot holder. Next cut a piece of felt slightly bigger than the t-shirt piece. Now lay the shirt on top f the felt, and sew around all of the edges. Cut a small strip from the felt and sew it to one of the corners of the square. Now you have completed your potholder, and you have recycled one of your favorite shirts.

There are many ways to recycle things found around your home into fun and useful craft projects. I hope these ideas have helped you to reuse some of the items you might throw out.

Wednesday, April 14, 2021

April Bulletin Board Ideas for Preschool


Preschool kids love creating projects for the bulletin board, and these April themed ideas are fun for the entire class. April has a lot of holidays to choose from when designing the bulletin board. This article discusses April bulletin board ideas that are great for preschool.

Arbor Day Hand Print Tree

Arbor Day is a holiday to remember in April. Preschool kids will love this bulletin board idea. You will need green paint, paper plates, brown paper, scissors, and butcher paper. Start by covering the bulletin board with the paper.

Pour paint onto each plate and help kids press their hands into the paint. Then they can press their wet hands onto the brown paper. Help kids cut out their handprints after the paint has dried. Make a tree trunk for the leaves using the brown paper. Add the hand prints to the tree to finish this April themed bulletin board in remembrance of Arbor Day.

Umbrellas

Another April bulletin board idea is umbrellas. You will need blue butcher paper, white oak tag, construction paper, scissors, pencils, and umbrella shaped cut outs. You can also use coloring pages that feature an umbrella is you like. Markers or crayons are also needed to color the umbrellas with.

For this bulletin board kids should color the umbrellas and right their names on them. Allow the preschool kids to personalize their umbrellas to their liking. While they are working on their part cover the bulletin board with the butcher paper.

Then use the oak tag to create a large rain cloud. Use the markers to write the name of the class on the rain cloud. Then cut out raindrops from the construction paper. Add the rain drops and the cloud to the center of the bulletin board.

Help kids attach their umbrellas to the April themed bulletin board and your preschool kids will enjoy displaying their work.

Creating bulletin boards with preschool kids is fun for them; it also helps improve their confidence and motor skills. Try these fun bulletin board ideas with your preschool students this year, and you are guaranteed to have a bulletin board you can be proud of.

Saturday, April 6, 2013

A Handmade Shop Review: OruAka Handcrafted Wood Jewelry, Accessories, and Supplies


I visited OruAka's etsy shop and immediately fell in love! On first thought I felt soothed and enticed by the great photos and soothing atmosphere, and then I found myself looking longer. This review is for all my friends, fans, and followers out there who love earthy and nature items that are gorgeous and practical. Ok, now let me tell you a litle about OruAka's shop and what you will find there when you check it out. 

OruAka has an assortment of "finely crafted wood jewelry and accessories including buttons;"  What accessories you may ask. Well, there is a large variety including "unique cufflinks, simple and elegant earrings and pendants pieces, barrettes, hair forks, hair sticks," and my favorite part is they state clearly in their shop info that they create custom pieces if you just send the a message to discuss it. 

Also, I have been provided with a coupon code for 10% off for all my lovely viewers. So make sure to head over and use this coupon code : sales10

Ok, enough talking right?  Here are some of my favorite items! On to the good stuff! 

Cedar Wood Buttons

Cedar Wood Wooden Buttons - Perfect Accessory For Your Crochet, Knit, And Craft Projects - 1 1/4" - 513


Bocote Wood Cufflinks And Tie Clip Set 


Bocote Wood Cufflinks And Tie Clip Set - The Perfect Birthday, Anniversary, Weding, Graduation, And Bosses Gifts - 708

Cherry Wood Three Prong Mini Hair Fork


Cherry Wood Three Prong Mini Hair Fork - Great Gift Item - 5"(12.7cm) - 776

These pieces are amazing, and they were only the first 3 I fell in love with. The thing I love most about these wood accessories is the attention to detail displayed in the accentuation of the wood grain. The colors and shape of the pieces combine with the grain in a way that makes each piece stunning in its own unique way.  You are guaranteed to want them all just I like do.

So remember to check out OruAka, and check back with me often for more handmade shop reviews!


Monday, April 1, 2013

Kaizen by Xubrnt Drawn on Life; A Bag Inspired by Life and Catered to Your Needs


Kaizen is a unique product that I would like all my friends and fans out there to check out and help raise funds for. The literal Japanese translation of kaizen is "change for the better" and this bag truly is. It is a wonderful product being created by Xubrnt and she is currently raising funds for a sewing machine she will need for the project.


Kaizen is a unique type of bag created from mini diamond ripstop poly/nylon which is durable and affordable! The bag comes in a variety of colors, and it "will hold your plastic, money, love notes, receipts, chapstick, and your keys with the attached split key ring, that can hang from your belt loop, back pack, or inside your purse". 


Check out this video to find out more! And remember to visit this page to help raise funds and receive something awesome in return. 

Check out this page to find out more about Xubrnt


Wednesday, June 20, 2012

How to Easily Make a Floral Tiara for a Summer or Spring Wedding

You can make your own floral tiara for your spring wedding. Floral accessories are a must for spring weddings, and a tiara is perfect for the bride's big day. This article will provide you with detailed instructions on creating the perfect floral tiara for your special day in spring.
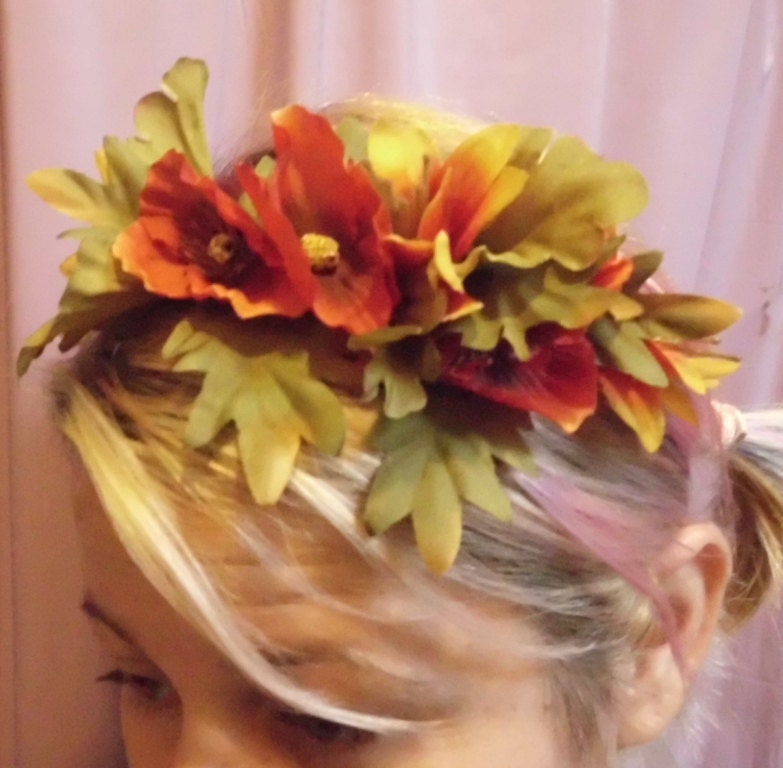
Flower Crown Sale Fall Fire Circlet Tiara Fairy Hair Accessories Halo Headband
This crown is on Sale for only $7 Here 

When creating a vine tiara you will need a few thin vines, a bowl of water, string, scissors, and wire. Start by bending and wrapping a few vines together into an appropriate length for the tiara. Then bend the length of vines to make a U shape. Only bend the vines as far as they will go, and tie the string around the other end of the vines. This will keep the bended shape in the tiara.
Soak the vines in the bowl overnight. If the vines need to be bended more to make the correct shape, you can undo one end of the string, bend it more, and reattach the string. After the vines have dried wrap the second side in wire, trim the ends, and remove the string. The crown will keep its shape; you can add combs to the sides of the tiara using hot glue if you would like more stability.
Adding floral accents to your crown is important for spring weddings. Springs leaves for several appropriate flower choices such as daisies, anemones, apple blossoms, and lilies are all perfect spring flowers for a bride, and there are plenty of colorful flowers to add detail and beauty to tiaras. Begonias, cherry blossoms, and dahlias are bright flowers that will stand out in a crown.
Using a hot glue gun to add items is the best option, and there are many other items that look great in a spring wedding tiara. Adding pine cones, leaves, and acorns are a fun idea for these floral tiaras, and curly bits of vines, shells, feathers, and dried berry clusters add accent to these pieces. Adding beads, wire, gems, feathers, and glitter pigment will make your tiara sparkle. Jewelry findings, iridescent marbles, and pearls also add shine to your spring wedding crown.
Making a floral tiara for your spring wedding is inexpensive and easy. The tiara is a focal point of any outfit, and a handmade crown will make you really stand out this spring.

Saturday, February 4, 2012

Valentine's Day Crafts for Adults

With all the kids craft ideas out there adults can sometimes get left by the wayside, but this Valentine's Day there are plenty of fun crafts that adults can do. Valentine's Day is not just for eating chocolate and giving roses; it is a great holiday for crafting. This article will provide adults with several Valentine's Day crafts that they can enjoy.
Abstract Love Emotion Painting
Love is a mysterious thing, and it is a simple word, but it is hard to put it into imagery. Instead of focusing on the regular images associated with love this Valentine's Day try making an abstract love emotion painting. For this you will need music that reminds you of love, tempera, acrylic, or watercolor paint, paper, a paintbrush, and a marker.
Start this craft by finding a comfortable spot to work and gathering your materials. Put on the music you have chosen, and get comfortable. Write the word love somewhere on the paper; feel free to put it wherever you like and make it whatever size you like. Next think about love and how it makes you feel and paint. Use whatever colors you like, and whatever images or symbols you like. Try to go with your gut and just paint. When you are satisfied with your love inspired craft you can hang it on your wall for Valentine's Day.
Quote Wall Hanging
For this Valentine's Day craft you will need to find a quote that encompasses what love means to you. It can be short and sweet or a paragraph long. Print the quote out or write it neatly on a piece of paper. Use other mediums to embellish the quote. You can make the first letter much bigger than the rest and make a nice border around that letter and the top and side of the quote, or you can write the quote simply and add some small hearts underneath it. Decorate the quote however you like and frame it. This Valentine's Day craft is a nice way to bring the reminder of love into your home.
Love Collage
Making a love collage is a fun way to examine how you feel about love while making a nice piece of art. For this craft project you will need a piece of cardboard, old magazines, scissors, and glue. Start by cutting out the letters L,O,V, and E, and glue these letters to the middle of the collage. Next cut out several images that remind you of love; if you are thinking about a specific person you can add photos and items that remind you of them. Glue all of these items to the cardboard, and attach a piece of ribbon to the back so you can hang it up for Valentine's Day.
Adults can make many fun and inspiring crafts for Valentine's Day, and spreading love is always a good idea; so why not get out your crafting supplies and start getting artsy!

Saturday, November 12, 2011

Pine Cone Crafts for Thanksgiving

There are several pine cone crafts for Thanksgiving; they are inexpensive and easy to create, and they add special holiday spirit to your home. This article will discuss several pine cone crafts for Thanksgiving.
Turkey Centerpiece
Pine cones can help you make a lovely turkey centerpiece for Thanksgiving. For this craft you will need several pine cones, red, orange, and yellow paint, a gourd with a long neck like a turkey, a hot glue gun, hot glue sticks, a paintbrush, newspaper, two cloves, a toothpick, and a piece of candy corn.
Start this centerpiece by covering the work area with newspaper. Then paint each pine cone different colors like the tail feathers of the turkey. You will also want to paint some small pine cones for the turkey's head feathers. While the feathers are drying press the cloves into the top of the gourd using the pointed side. You may want to start the hole with a toothpick. The cloves will look like eyes.
Then add the candy corn like a beak by pushing a toothpick into the flat end of the candy corn. Push the toothpick into the gourd to secure it in place. Finally glue the pine cones onto the back of the gourd like feathers, and your turkey centerpiece is ready for Thanksgiving.
Thanks Garland
Another pine cone craft that will add a special touch to your Thanksgiving decor is a thanks garland. For this holiday craft you will need several pine cones, ribbon, heavy paper in fall colors, scissors, a pencil, leaves, glue, a paintbrush, a marker, hot glue sticks, and a hot glue gun.
Start this craft by cutting the ribbon long enough to suit the garland you want to make. Then use the paintbrush and glue to attach several leaves to the paper. Use the paintbrush to create a fine, even layer of glue. When the leaves have dried use the marker to write something you are thankful for on the backs of each leaf. Cut each leaf out and glue a pint cone to the top of them. Make sure the pine cone slightly hangs off the edge of the leaf. Then glue the other end of the pine cone to the ribbon to complete the garland.
These Thanksgiving craft projects are fun and easy, and they use pine cones as their main source. Enjoy taking a walk in the brisk autumn air, and you will find many pine cones to use for this craft.

Friday, November 11, 2011

Christmas Ball Crafts Projects for Adults

Christmas balls are a popular and inexpensive crafting item for the holiday season; they also make wonderful personalized Christmas ornaments and decorations. Christmas balls provide adults with a great opportunity for many beautiful and fun Christmas crafts, and this article will provide you with several Christmas ball crafts projects for adults.
Pigment Balls
This Christmas ball craft project produces one of the most unique and beautiful Christmas balls I have ever seen, and it is a very simple craft project for adults to complete. For this project you will need a paint brush or tongue depressor, pigment powders in your preferred colors, clear Christmas balls, and clear coat sealer spray.
To begin this project you will need to remove the top part of the Christmas ball. Do this carefully by pinching the wire circle together and popping off the top. Next spray the clear coat sealer into the ball and make sure there is enough to coat the entire inside of the ball. Now use your paintbrush or your tongue depressor to scoop up some pigment powder and drop it into the ball. Swirl it around and add more colors. Continue adding colors and swirling until you are happy with the balls design, and rest it upside down to dry. When your Christmas ball craft project is dry you can replace the top and hang it in your home.
Decoupage Balls
When deciding to make a decoupage Christmas ball craft project you must decide on the theme of the ball. You can use a traditional Christmas look by using old Christmas cards, you can use a color theme and cut out images in one specific color, or you can just use any images you like. No matter what decoupage theme you choose for your Christmas ball craft project the method for making this project is the same.
You will need several cut out images, crafting glue, a paintbrush, and a Christmas ball. Once again start out by removing the top of the ball. Next paint a thin layer of glue on the section of the ball where you will place your first image. Press the image into the glue and smooth out any air bubbles by adding another thin coat of glue to the top and edges of the image; continue adding images until the entire ball is covered, and allow the Christmas ball to dry. You can place a pencil inside the ball and put the pencil in a bottle to hold it upright; this will allow all of the sides of the ball to dry evenly.
Making Christmas ball craft projects is a fun and fulfilling way to for adults to be creative while making fun personalized Christmas decorations. Adults should these Christmas ball craft projects this holiday, and they will be amazed at what wonderful Christmas crafts they can make with their own two hands.

Sunday, September 4, 2011

5 Fun and Easy Fall Themed Crafts for Adults

1. Pumpkins Centerpieces
Fall is a great time of year for decorating your home with nature items. The autumn leaf change provides vibrant colors in all sorts of variations of red, orange, yellow, brown, and green. Acorns and pinecones are in abundance, and pumpkins, squashes, and gourds are showing themselves in the garden and grocery store. Using these items to create easy fall themed centerpieces is a great  home decor craft for adults.

2. Fall Themed Fabric Flower Bouquets


Creating fabric bouquets from felt requires only needle, thread, wire, scissors, and creativity. This fall home decor project is a great way for adults to create flowers that will last them for years to come.

3.Apples

Dried apple crafts are an obvious fall project. Apples are plentiful in the fall, and taking a country drive to see the fall foliage and pick apples is as American as well, apple pie. There are many craft projects using dried apples. Check out this article  to learn how to make a dried apple centerpiece.


4. Scarves and Hats

Fall brings the chill of winter, and the cool autumn nights will be even better with handmade scarves and hats. Whether you are crocheting, sewing, or braiding a scarf or hat for the autumn tempetatures; this is a great fall themed craft for adults.

5. Nature Wreath

During autumn we gather, and this is an appropriate time to make a beautiful fall wreath. There are so many items available; it would be silly to pass up on this fall themed craft. Use vines and branches for a base, and add acorns, pine cones, and dried berries or nuts to decorate the wreath, and don;t for get to add colorful fall leaves. 


Monday, August 22, 2011

Back to School Countdown Day 6: Time Capsule Crafts with Kids


Easy, Back to School Time Capsule Craft with Kids

Making an easy, back to school time capsule with craft with kids is a lot of fun. This kid craft is a great way to get ready for the year to come. It is also a wonderful way to remember the past. This article will provide you with detailed instructions for creating an easy, back to school time capsule craft with kids.
When creating an easy, back to school time capsule with kids you will need several personal items. For this craft start by having your kids think about all the things they are interested in at the moment. Pictures of their favorite celebrities, clothing, colors, food, and movies are all good ideas for this time capsule craft. More items that go well in a back to school time capsule is money, cds, jewelry, and other personal item that your kids would like to keep safe in this craft.
It is also nice to include a letter written by your kids to their future self. Including information about what they expect in the year to come is a nice addition to this letter. Remind kids that the will not see these items until the next time they are going back to school, and it is important that they include any information they would like to find later on.
To complete this craft you will also need a coffee can or large plastic bottle. You will also need duct tape. When choosing the duct tape you will use, be creative. Duct tape comes in a variety of colors and patterns. Be sure to choose tape that your kids find interesting.
To complete this time capsule craft with your kids put all the items in the can or bottle. Then close the lid tightly. Seal the entire can shut by covering it completely in duct tape. Add a second layer to make sure it is sealed well and water proof. Then dig a hole in your yard and bury the time capsule with your kids the day before they go back to school.
This easy craft is fun to complete with your kids. A back to school time capsule is fun to open up at the end of the year and see how much your kids have changed and grown. Create this easy, time capsule craft with your kids in honor of going back to school, and you will have a great time.

Gishmas 2021 List

 Day 1 Challenge: December 20th – Image or Video What powers GISH? Love, actually. So, let’s spread some cheer. Using the GISH App or search...