Showing posts with label project. Show all posts

Sunday, April 25, 2021

Green Garden Crafts: Stepping Stones


Garden crafts should be green, and there are so many fun garden crafts that are easy and eco-friendly. You can use broken dishes and pottery, leaves, and bottles to make stepping stones, and these green garden crafts is inexpensive and uses recycled items.

Broken Dishes and Pottery

Making a stepping stone for your green garden can be done uniquely with broken dishes, plaster, outdoor paint, and a plastic plate. Start by making a fun pattern, design, or shape with the broken bits of pottery and dishes.

Then mix the plaster according to directions and pour it onto the plate. Allow for some room to add the broken pieces and place them gently into the plaster. Allow the entire creation to dry before painting it. This green craft will make a lovely stepping stone for your garden.

Leaves

Using leaves to make a unique imprint on plaster is a great way to design a stepping stone for your garden. For this green craft you need plaster, outdoor paint, leaves, a paintbrush, and a plastic plate. Start this green craft by pouring the plaster onto the plate; then arrange the leaves in any design or pattern you like.

Allow the plaster to dry thoroughly, remove the stepping stone from the plate. The leaves will come off of the stepping stone easily. Use the outdoor paint to add details to the stepping tone, and seal it with an outdoor sealer spray if you like. This green craft is a great way to make a stepping stone for interest in your garden.

Bottles

When creating green crafts for your garden you should consider using glass bottles. For this garden craft you will need a few glass bottles, a disposable plastic food container, plaster, and outdoor clear sealer spray.

Start this craft by breaking the glass bottle; this can be done safely by wrapping the bottle in a piece of rug or carpet and hitting it with a hammer. After you have your broken glass you should mix the plaster and pour it into the container. If you are making a very high stepping stone you can add a bottle to the center if you like, but make sure to use less plaster to start.

Use the broken glass pieces to make a mosaic in the top of the plaster; remember to create whatever design you like and pay attention to negative space. When the plaster has dried spray it with the sealer, and place this green stepping stone craft in your garden.

Stepping stones are a great green craft for your garden, and once you start making them you will find new items of interest to make stepping stones with as well. Enjoy these crafts and happy spring!

Friday, April 23, 2021

3 DIY Kitchen Window Treatments


Adding a nice window treatment to your kitchen can really brighten up the mood, and it is easy and fun to do on your own. Making your own kitchen window treatment can be inexpensive as well as personal. Here are three methods for making your own perfect window treatment.

For a thrifty and resourceful kitchen curtain simply pick out two kitchen dish towels that are long enough and wide enough to cover your window. Next find a think piece of ribbon that matches your towels and your kitchen. Fold the ribbon in half and attach it to the towel on the top. This will create a pocket to stick a curtain rod through. You can sew the folded ribbon to the towel or you can glue it. The hem tape that you iron to activate also works well for this project. You can add fake flowers, more ribbon, buttons, or other embellishments to the curtains if you like. Finally string the curtains on the rods and hang.

Another fun and unique kitchen window treatment requires the use of scarves. You can use several pretty scarves, or you can simply use one. If you are using one scarf you can fold it to make a triangle and hang the corners through the hooks for the curtain rod. If you have a couple more scraves that are long braid or twist them together in the middle and drape around the window. Let the ends hang loose for a dramatic effect.

For a very personal and attractive look utilizes handkerchiefs or bandanas. You can use many different colors and patterns to make this window treatment even more exciting. Simply tie the end of each handkerchief around a curtain hook and string onto the curtain rod. For another neat handkerchief look fold the handkerchief into a triangle and tie one end of a handkerchief to a curtain hook. Next tie the other end to another curtain hook, but also tie the end of another folded handkerchief to that hook. Continue until you make a chain slightly bigger than your window. Finally finish the window treatment by stringing the hooks onto the curtain rod and hanging it.

Creating a fresh look in your kitchen is as simple as creating your own custom window treatment, and these three ideas will help you get started on renewing your kitchens appeal. The techniques you have learned here will inspire and delight you and your kitchen guests for long to come. So go get crafty!

Wednesday, April 21, 2021

Mother's Day Silverware Crafts with Kids


You can make Mother's Day silverware crafts with your kids easily. Silverware can be purchased inexpensively at local dollar stores, thrift stores, and yard sales. This article will provide you with instructions for creating a wind chime, bouquet, and photo holder with your kids for Mother's Day.

Wind chime

For this Mother's Day craft you will need several different pieces of silverware, fishing line or dental floss, scissors, and ribbon. You can also use pliers to make this craft easier for kids.

Start this craft by helping kids bend a piece of silverware into a circle. Then cut a piece of ribbon about 12 inches lo9ng and tie it to both sides of the circle. Help kids cut several pieces of dental floss and tie the ends to pieces of silverware. Tie the other ends of the floss to the circle. This easy Mother's Day craft is a great gift kids can make for mom.

Bouquet

For this Mother's Day craft you will need several pieces of silverware, a glass jar or tin can, a hot glue gun, hot glue sticks, buttons, pliers, ribbon, scissors, paint, and a paint brush.

Start this craft by helping kids turn the silverware into interesting floral shapes. This can be done easily by bend prongs on the forks. Handles can also be bent to add detail to the stems of the flower.

Then help kids paint all of the silverware to look like flowers. Glue buttons to the inside of spoons to resemble flowers as well. When all of the silverware has dried tie a ribbon around them and place them in the tin can vase. This Mother's Day craft is easy for kids when you use inexpensive silverware, and plastic silverware can also be used.

Photo Holder

You will need two forks, a flower pot, a piece of foam that fits snugly inside the pot, moss, small fake flowers, ribbon, scissors, glue, and two photos for this Mother's Day craft.

Start this craft by placing the foam inside the flower pot. Then use the glue and the moss to completely cover the foam. Stick the handles of the forks into the foam and add more moss and flowers around the handles to secure them in place.

When the glue has dried tie a ribbon around the pot and place the photos securely in between the prongs of the forks. This Mother's Day craft is a great gift that kids will love to make.

Silverware is an inexpensive and fun medium for these Mother's Day craft projects. Kids will love being creative, and moms will enjoy these unique gifts.

Friday, April 17, 2015

Have it all Step 1 - The Life Planner Binder

Ok so we all know the most important part of any plan is the plan itself, and if you want to have it all in life, that means having your cake and eating it too, then you need a good plan to start. So after years of working and working and feeling like there was no end to to the vicious cycle I finally created a life planner, and to my surprise not only has it made me happier and more efficient it is a lot of fun too.  I have to shout out to Alaina Leary for the inspiration I took one look at this confetti vellum page marker and was totally inspired. Check out her work and the tutorial at this link

https://alainaleary.wordpress.com/2015/03/03/do-it-yourself-confetti-business-cards-thank-yous-bookmarks/


Ok so with no further ado here are some pics of my planner


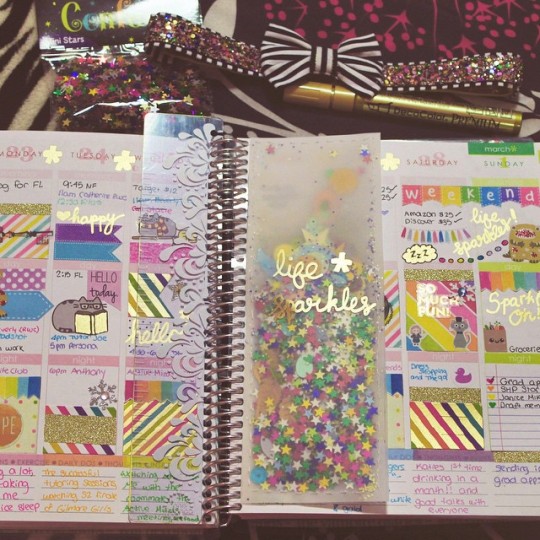
Isn't it so cute! It is actually an American girl doll binder I got on clearance for about $3 at the craft store. It came with a couple pretty patterned divider pages and 2 clear sleeves.  


This is a little in case of emergency note.

Here is an awesome pen slash tool holder I made with some elastic cord, cardboard, fabric scraps, and a glue gun. I am making 2 more for my niece and nephew shortly so I will post a tutorial and link here soon!

This shows the back of the pen holder, and an awesome multi-pocket divider, organizer for keeping all my stickers, scrap paper, and such. It was pretty easy to make using stickers, glue, old folders, and cardstock. Check back for instructions!

the back of the multipocket divider. I love the long pockets and the space to keep my mini sticky notepad. The blue patterned divider came with the binder. So cute!

Here is a look at my daily to do list. It is crazy, but I like to keep a spot for positive and not so positive outcomes. I a working with highlighters and started using number stickers trying to figure out all the random things I have to do everyday. I list work projects, some home stuff, happy stuff, and any other obligations or important things.

  
Here is what it looks like empty. I will be posting a downloadable link shortly if anyone is interested in printing it out. It could be prettier, but I would rather color on my pages than use the colored ink.

Ok so one of my biggest challenges is organizing, decluttering, and maintaining my house. It is crazy, crazier than possibly imagine. I mean I am not fit for a hoarding reality tv show, but a couple more years of living this way and I just might be. So this is my basic daily, weekly, monthly house cleaning list. You can find the original printable version of the daily cleaning planner page from Shemakesahome at this link; I switched it up to suit me, but that is the fun part. Love it!


I made this up real quick in photoshop. It is a fun meal planner so I can try to eat better and more creatively. Or at least be aware of when I am eating too much junk =)

A simple cardboard divider. I plan on filling it with quotes. 


My basic shopping list for my business. One of my main time saving goals lately is trying to go shopping as little as possible and always being aware of what I need has saved me trips and time. I also have a bill list to make sure I am keeping that on track here. 

This is a fun page where I set monthly goals, happy thoughts, things I want to try, and random monthly goals.  


Blank goals page

I make arts and crafts, costuming pieces, jewelry, and assorted pretty things so I am constantly updating my order lists. This is my basic work order list where I breakdown all the different orders I have to make and organize them by type of item and date. I also keep a little section for rush orders. It is so handy to have this all the time, and I use labels to add more orders if I don't feel like using a new page. Super handy! 

This is a fun little page for any ideas or inspirations. 

Here are those clear sleeves with a handy quick reference calendar and an awesome drawing from my nephew. 


I love my planner/binder. Still not 100% sure what to call it, but awesomeness. I will update with links to tutorials and printable pages for everything you see here shortly. Feel free to ask any questions, comment, or link to pics of your planner. I am off to cross "blog about planner" off my to do list!

Wednesday, July 9, 2014

The Mold Terrarium: Perfect Fourth-Grade Scientific Experiment

The mold terrarium is an awesome scientific experiment for fourth-grade students. This experiment is excellent for a class that is discussing the scientific topic of how food is degraded into nutrients into the soil. The mold terrarium is a great project that is not only fun, but it is also easy.
In order to create a mold terrarium I would need container that is clear, has a lid, and can be thrown away after the experiment is over. Water and adhesive tape are also necessary to complete this experiment. Some leftover food is the final ingredient needed and can be brought from home by the students. The food should vary, but fish, poultry, and meat should not be used because they will start to smell badly.
In order to be safe make sure to let students know that the terrarium should not be opened. The entire project must be thrown away after the experiment is over. It is important to let the students know that it is bad for people to breathe in mold, and it may make students sick. It is important to stress that the jar not be opened. It is also important to emphasize that the lid will be taped so that it cannot be opened. The jar should also be placed in a safe spot where it will not get broken.
In order to complete this experiment; students must bring in pieces of food from their homes. All of the food items should be cut into 1-inch pieces, unless they are already smaller than an inch. If you are using a jar lay it on its side so there is more surface area to cover with food. Take the food pieces and dip them in water. Next lay them in the glass jar so that they are close to each other, but not touching. Close the lid on the container and tape it shut. Label your mold terrarium and put a sign on it that says do not open. Students can check the mold terrarium everyday for about 2 weeks, and they will see the various changes in the food. They will see how mold grows, and how food decomposes.
In order to monitor student performance, I can have them keep a journal about their thoughts on the mold terrarium. Through this journal I can observe if the student has accurately observed the concept, if the student has theorized about the cause and effect of this experiment, and I can judge if the student is trying to collect data on this assignment. I can also have the student make a drawing of one piece of food in the terrarium every couple of days in order to help visualize the concept of how mold grows. These ideas will not only help reflect the student's performance, but they will create opportunities for cross-disciplinary learning as well.
In order to assess this lesson I will question whether or not the students enjoyed the lesson and participated in it. I will also assess whether or not students seemed to grasp the concept of this lesson, and whether or not the experiment helped. I will also assess the use of journals, and have the students do oral presentations in order to see what they have learned. I will also assess whether or not all of my safety precautions were enough or not.
This project is fun for children, and it is hands on so I think it will help to get students involved. It presents cross-disciplinary opportunities and allows for students to watch how something grows. Overall I think a mold terrarium is an interesting and fun science project that has much learning potential.

written by Sarah Ganly

Gishmas 2021 List

 Day 1 Challenge: December 20th – Image or Video What powers GISH? Love, actually. So, let’s spread some cheer. Using the GISH App or search...