Monday, May 24, 2021

Recycled Teen Crafts with Newspaper

Newspaper is a common household item that gets thrown away, but you can use it for fun teen craft projects. This article will provide you with detailed instructions on creating several recycled teen crafts with newspaper.

Tree Sculpture

A fun craft for kids that uses recycled newspaper is a tree sculpture. For this recycled craft you will need newspaper, glue, yarn, scissors, and cardboard. Start this recycled teen craft by helping teens roll several pieces of newspaper around into a trunk shape. Glue the shape and tie it with yarn to help keep it in place while drying.

Cut a couple of slits into the bottom of the trunk, and glue these slits to the cardboard to help your newspaper tree stand up. Then help teens roll more sheets of newspaper into smaller tubes for branches; glue and tie the branches as well.

Then arrange the branches inside the recycled newspaper tree trunk and apply glue to secure. Teens can then paint this tree if they like, and they can add tissue paper for leaves as well. This fun recycled teen craft is easy and inexpensive to create.

Magnetic Poetry

Another recycled newspaper craft idea that will help teens be creative while learning is a magnetic poetry set. For this recycled craft you will need newspaper, scissors, magnetic sheets, and glue.

Start this recycled teen project by helping kids look through the newspaper for words. Cut out several words and glue them to the magnetic sheets; remember to place the words close together to utilize as much of the magnetic sheet as possible.

Also remember to cut out useful words such as "the" and "is". Commonly used words are necessary, but also use interesting words to make this recycled teen craft more fun. When the glue has dried cut the words out, and you and your teen can have fun creating poetry with this recycled newspaper craft.

Photo Frame

Recycled newspaper can be used to create a photo frame, and all you will need for this craft project is newspaper, glue, a razor, and cardboard. Start by cutting two pieces of cardboard into rectangles of equal size. Then cut a smaller rectangle out of the middle of one of the rectangles.

Next help your teen find interesting headlines or articles in the recycled newspaper and glue them to the cardboard frame. Then glue the sides and bottom edge of the frame to other piece of cardboard and when it is dried it is done. This recycled newspaper craft is easy and fun for teens.

Using newspaper as a recycled craft item is a good way to teach teens about recycling, and it is a fun way to bond with your teen; so try these craft ideas today.

Middle School Science Lesson Plan: Geography, Climate, and Adaptation

Imagination and creativity are important when creating science lesson plans, and students will learn through creative and critical thinking when presented with this lesson plan. Geography, climate, and adaptation can all be taught through this middle school science lesson plan.

For this lesson plan it is important to break the science class into groups. There are also some materials that are needed to complete this science lesson plan with middle school age children. The materials you will need are oak tag, pencils, colored pencils, and pens.

Start by instructing groups that they must create a map, and they must use their imagination to develop a country. The middle school students must work together to map out the geography and climate of their country. After they have worked on this project for about half an hour ask students to compare their map to a map of the united states and talk about animal life and plant life.

Then have the middle school students design a list of three plants and animals from their country; then have the groups also list characteristics for each animal and explain why these characteristics are appropriate. Also require that the students name all of the creations and explain where each animal and plant resides. Help students focus on the connection between geography, climate, and wildlife.

When the country and its inhabitants are all complete, have the each group present their creation to the entire class. Then have the entire class compare the new countries to the United States geography and climate, and this lesson plan will help students see the connection between geography, climate, and wildlife adaptation and its similarities or differences to the United States.

This lesson plan should take about a week, and the require materials are inexpensive and easy to find. Some research materials for this lesson plan are wildlife magazines, botanical and gardening guides, and historical wildlife books.

This lesson can be alter can include researching geography, climate, and wildlife of several different contents. This will allow students to learn about many different areas of land, many types of plants, and many different animals. If requiring different groups to emulate different continents allow students more time to discuss and compare continents.

The food chain can also be added to this project by requiring students explain how the animals, plants, and geography work together. Teachers should inspire students to question climate change and its relation to animal and plant life adaptation as well. Students can be asked to take one animal and plant out of its natural climate and place it in a different geographical area. This will require middle school children to consider adaptation on a more extreme level.This middle school lesson plan will require children to use their critical and creative thinking skills to understand geography, climate, and wildlife adaptation.

Kounin's Theories on Lesson Management and Discipline in the Classroom


Kounin's theories on lesson management and discipline in the classroom shaped education as we know it. This article will discuss his basic theories known as withitness, momentum, smoothness, group alerting, accountability, overlapping and satiation. CONTENT: Kounin's theories on lesson management and discipline in the classroom shaped education as we know it. Kounin was an educational psychologist who "became known for his detailed investigations into the effects of classroom management and lesson management on student behavior." (Charles & Senter, 2004, pp.56). This article will discuss his basic theories known as withitness, momentum, smoothness, group alerting, accountability, overlapping and satiation (Charles & Senter, 2004, pp.56).

Withitness

This simple term means to know what is happening in all areas of the classroom at all moments. Teachers are much like managers because they must know what is going on with all the students just like a manager must know what all the employees are doing.

Momentum

Kounin described this skill as "starting lessons with dispatch, keeping lessons moving ahead, making transitions among activities efficiently, and bringing lessons to a satisfactory close" (Charles & Senter, 2004, pp.58). Momentum keeps the lesson moving. It creates discipline through lesson management.

Smoothness

This ability is important in a classroom in order to keep students focused on the lesson. Management of distractions and consistency will add to discipline throughout the lesson. Smoothness keeps students involved and active in the classroom.

Group Alerting

Lesson Management and discipline rely on group alerting to keep students focused in the busy classroom. Successful teachers have "systems for gaining student attention and clarifying expectations" ( Charles & Senter, 2004, pp. 58).

Accountability

Effective lesson management is achieved through the theory of accountability. Teachers can manage a classroom and instill discipline in students by making sure to keep them accountable for the actions and their learning. This method should be practiced "regularly calling on students to respond, demonstrate, or explain" (Charles & Senter, 2004, pp.59).

Overlapping

When trying to instill discipline in a classroom overlapping is a valuable tool. Overlapping requires teachers to focus on more than one area of the classroom at the same time. A teacher must be able to "attend to two or more events simultaneously" (Charles & Senter, 2004, pp.60). This lesson skill will achieve lesson management in a classroom and promote discipline.

Satiation

In effective lesson management a teacher will inspire and maintain a students involvement, but a teacher must also monitor it. Effective lesson management requires a teacher to know when "students have had their fill of the topic as indicated through disengagement, boredom, and misbehavior" (Charles & Senter, 2004, pp.61). Discipline in the classroom is easier to achieve when students remain interested in the subject matter. It is important for a teacher to know when to move on.

Kounin's theories on lesson management and discipline in the classroom are still held in high regards in our educational system today. Teachers must understand and utilize the theories of withitness, momentum, smoothness, overlapping, group alerting, accountability, overlapping, and satiation to effective instill discipline through lesson management.

Reference:

Charles, C. M., & Senter, G. W. (2004).Building Classroom Discipline (8th Edition)(8 ed.). Boston, MA: Allyn & Bacon.

How to Create a Flower Garden Layout


Creating a flower garden layout is easy and beneficial for several reasons. Creating a flower garden layout will allow you to maximize your garden space, create depth, and add style to your garden. These simple steps will help you learn how to create a flower garden layout.

1.Draw a map of your garden. You can simple use a pencil and paper, or you can break out the crayons to add detail and color to your drawing. Either way start by drawing the basic shape of your garden. Remember to add details such as existing plants, rocks, and decorations.

2.Determine the amount of sun and water your garden will receive. If there are many trees than you know you will be looking for plants that tolerate shade. If you do not plan on being able to water the garden often you will want to look for flowers that tolerate drought.

3.Determine what type of pests you will have to deal with. If you have deer in your area you will need to chose plants that the deer are not fond of if you want your garden to grow nicely. Beetles, aphids, and ants are all common garden pests that can affect your garden and you will want to take precautions for them. You may also want to build a fence to keep out unwanted animals.

4.Pick out flowers. After you have established the growing conditions in your garden and the pests that are native to your area you can pick out flowers. Start by researching on the Internet and visiting local garden stores to get an idea of what type of flowers you would like in your garden layout. Make a list of the flowers you would like, their colors, height, bloom time, and spacing.

5.Now use your list to create your flower garden lay out. Remember to consider the height, colors, and spacing when creating your layout. Taller plants can be used as borders or focal points. Varying height will add depth and interest to your flower garden layout. Also keep color combinations in mind when creating your layout. Using colored pencils or crayons to simulate the plants on your layout is a great way to get an idea of your finished garden. Bloom time is another factor to incorporate into your flower garden layout, and it should be used to make sure the entire garden is blooming all season.

Creating a flower garden layout will help you eliminate garden woes before they occur. These simple steps will make your garden layout easy to create, and your flower garden will be guaranteed to please.

Home Decorating Crafts with Photos

There are plenty of fun and easy home decorating crafts you can make with photos. Photos are easy to work with. They provide you with limitless options to focus on. This article will supply you with detailed instructions on several home decorating crafts with photos.

Alphabet Photos

Alphabet photos are a fun way to send a message through images. This craft is easier with a camera, but it can be accomplished with magazines or photographs. You can also choose to hang your alphabet photos in separate picture frames or in a picture frame with several areas for images.

Start by deciding what you would like to say with your photos. A short message such as "joy" or "love" works well, but you can feel free to be as creative as you like. Now take your camera and look around for images that look like the letters you need for your chosen word. You can also arrange items in the shape of letters and photo them to fit the theme of your word. IF you do not have a camera, look through a magazine for images in the shape of letters.

When you have all the photos you need arrange them in the appropriate order and place them in a frame. This one of a kind work of art is a great way to decorate with photos.

Stories

Another fun twist you can create with photos is a story. Choose photos for this project that tell a story and place them in chronological order in a large frame or several smaller frames. There are several different options to consider when creating your photo stories, and fun details are perfect.

An example of this home decorating craft is the story of how you met your spouse. For this craft you will need photos of you are your spouse before you met, the place you met, the two of you together, and any other little details that stick out. For example if there was a particular food you ate or the view from the window of the restaurant. Personal details will make interesting photos and add to the details of the story. Remembers photos can be taken after the story being told.

After all photos are gathered place them in frames and hang them in a cluster together on the wall. You can also use paint markers to add dates and details to the frames. These handwritten details will help explain the story and add charm to this home decorating craft.

Photos are a great medium for home decorating crafts because they provide your home with special memories. These crafts are easy and will bring photos into your home decor in a way that is unique and charming.

Sunday, May 23, 2021

Natural Ways to Lower Soil PH Level

There are many natural ways to lower the soil pH level in your garden. Many plants need a lower soil pH level in order to grow and produce healthily. Lowering the ph level in your garden soil is essential when growing blueberries, cranberries, orchids, hydrangea, and azaleas.

The pH level of your garden soil can have a strong impact on plants. Certain minerals can only be absorbed through soil with lower pH levels. Osmotic water pressure is is also affected by pH level of the soil in your garden. A lower pH level also dissolves metals in soil.

A lower ph level can be achieved through several natural means. Many of these means are temporary so the soil can be used later for other plants that do not require a low pH level. Some natural methods for lowering pH in soil can be found right in your kitchen, and some are little more expensive. If you are trying to grow plants that need a lower pH level these methods are imperative.

Coffee grounds can be used to lower the pH level in your garden. Place the grounds around the base of the plants that need lower pH. If you are amending the soil before planting mix the coffee right into the soil. This is a great way to recycle your coffee grounds and feed your plants.

Vinegar is another household item that will naturally lower the pH level of your soil. Add a few tablespoons of vinegar to a gallon of water and use it weekly around roots of the plants that need lower pH levels. This is a temporary fix, but will work quickly. Apple cider vinegar will work best for this method.

Sphagnum peat is another natural way to lower the pH level in your garden. This can be mixed with the soil before planting or place around the base of plants that are already in the ground. This should be done in the spring and fall to keep the pH level lower year round.

Adding sulfur or sulfur flowers to the top soil around your plants will also help lower pH levels in your garden. This method of soil amendment will work gradually over time. If you are adding the sulfur to soil before planting it will still take less time to lower levels.

These guidelines will help you lower the pH level of your soil in a natural way. Remember to check the level of pH in your soil beforehand to get an accurate estimate of the changes to be made.

Recycled Plastic Crafts: Spring Birdhouses

Plastic can be recycled to make lovely spring items, and birdhouses are a great addition to your spring décor. This article will provide you with detailed instructions on creating several spring birdhouse crafts out of recycled plastic items.

Milk Jug

A milk jug is an excellent base for a birdhouse made from recycled materials; for this spring craft you will need two plastic milk jugs, paint, a knife, a pair of scissors, weatherproof paint, a paint brush, a hot glue gun, and hot glue sticks. Start this craft by cutting a hole in the front of the milk jug to give the birds an entryway.

Then cut two adjoining sides of the plastic milk jug out to create a plastic 90 degree angle; this piece will be the roof. Glue the roof to the top of the milk jug to cover the cap. Paint the birdhouse and allow it to dry overnight. When it is done simply fill it with food and your spring birdhouse craft is finished.

Soda Bottle

Another recycled plastic birdhouse can be made from a soda bottle. This spring craft is easy to create and use; for this recycled craft you will need two large plastic soda bottles, a hot glue gun, hot glue sticks, a knife, and paint markers. Start by cutting a wide arched doorway in the front of the bottle towards the bottom.

Then cut the center of the other bottle out; you want the width of the plastic bottle piece to be about 4 inches. Then cut the plastic to create a rectangle and twist it into a funnel shape. Use the glue to secure it in place and trim the excess plastic; this will be the roof. If you are going to hang your birdhouse tie wire or ribbon to the top of the plastic bottle before gluing the roof in lace and leave a small hole in the small end of the funnel.

When the birdhouse is formed use your paint markers to decorate the plastic bottle, and allow the paint markers to dry. A clear plastic bottle makes an interesting birdhouse, and using recycled materials for your spring crafts is always a good idea.

Peanut Butter Jar

Turn a peanut butter jar into a small bird house using only a knife, a large soda bottle, a hot lgue gun, and glue sticks. Start by using a knife to cut a doorway into the front; then cut off the top of a soda bottle and glue it to the lid of the peanut butter jar. This simple birdhouse is sturdy and can be hung easily.Using recycled plastic bottles and containers to create spring birdhouses is easy and inexpensive. So try these crafts for your outdoor birds this spring!

How to Throw a Casino Night Dinner Party

Dinner parties can be boring, and sometimes it is hard to get people to actually come, but if you have an awesome theme for your party you will have more responses than ever before. This article will show you how to throw a casino night dinner party that I promise will be a hit.

In order to decorate for your casino night you will need bright lights, green table cloths, fake dice, fake money, and playing cards. Decorate your house with many Christmas lights, and hang large dice from the ceiling. You can create your own decorations by attaching playing cards to streamers and hanging them from the ceiling and around the house. You can also cut out hearts, clubs, diamonds, and spades from pieces of red or black colored paper and hang them around your house as well for decoration. Money symbols and fake money can also be hung around the house for fun. Remember to have fun no matter how you decorate.

Food is another important part of your casino dinner party, and you want to supply food that can be eaten easily and on the go as people move around the house to play different games. Finger food work best for this type of party. Vegetable platters with spinach dip are a great choice, and I live fruit platters with yogurt as well. Mini egg rolls and chicken fingers are also another good snack. Mini sandwiches are a definite choice for these parties, and I also like to make crackers with cheddar cheese and raisins for my casino parties. Remember to keep the food easily transportable and light, and have it set out in a buffet style so that the guests can bring their food with them to the games.

In order to get the games rolling at your casino party remember to have a few different tables set up. Some table you will need is a poker table, a blackjack table, and a roulette wheel. All of these tables will have green tablecloths and you will need someone to deal out the games or act as the leader. The guests can nominate themselves or you can choose to do it. Just remember to give all the guests fake money at the start of the night. I like to hand them a gift bag as they enter, and this bag will include a set amount of fake money, funny sunglasses and visors. These items set the mood for the party, and it allows the guests to start having fun.

Remember to have some fun prizes that your guests can trade in their play money for at the end of the night, and this party will be a blast!

Homemade Cars and Trucks Party Decorations

A popular kid's party theme is cars and trucks, and planning this party can be exciting too. Homemade party decorations are fun and easy, and they can make your party a little more inexpensive. This article will provide you with detailed instructions on creating several homemade party decorations with cars and trucks as the theme.

Tires

Cars and trucks have tires, and they are an easy and fun homemade party decoration to create. You can place these tire party decorations anywhere in your home. For this homemade party decoration you will need black construction paper, foil, a pencil, scissors, and glue. You may also want to use a plate to make a perfect circle.

Start this cars and trucks themed party decoration by tracing the plate onto the black paper. Cut the circle out. Then use a smaller plate to cut a circle out of the foil. When designing your tire rim you can be creative; there are many different tire rims on cars and trucks; so look at some images to get ideas. After you have completed the rim glue it to the center of the tire and your homemade party decoration is complete.

Road Signs

Another homemade party decoration that is perfect for your cars and trucks themed party is a road sign decoration. For this homemade party decoration you will need construction paper, a pencil, scissors, glue, and letter stencils.

Start this homemade cars and trucks themed party decoration by deciding what signs you would like to make. Then cut the desired shape out of the construction paper, and use the letter stencil to trace the letters you will need. Cut the appropriate letters out of the paper and attach them to the sign. When the glue is done your homemade cars and trucks party decoration can be hung on the walls of your home.

Checker Flag

Checker flags are reminiscent of cars and trucks, and they symbolize racing which is appropriate for this party theme. For this homemade decoration you will need white and black checkerboard fleece fabric, a hot glue gun, hot glue sticks, and a wooden garden stake.

Start by cutting the checkerboard fabric into a rectangular shape. Then fold the edge of the shorter side over about an inch and use the hot glue gun to glue the edge of the fabric to itself. Slip the wooden stake into the seam and add some more glue to secure your homemade party decoration.

Cars and trucks are a fun theme for kid's parties, and these homemade decorations are easy and fun to make. Instead of buying party decorations for your cars and trucks themed party try making them yourself with these homemade craft ideas.

How to Make Miniature Dishware for Dollhouses


Dollhouses need dishes. What would a doll do without a pitcher and some cups? What would a doll eat off of without plates? Dolls need the basic kitchen utensils too; so I have compiled some simple instructions on how to make some basic kitchen utilities.

Plates are easy and fun to make. You can make plates out of cardstock or out of clay. Both require the use of a quarter. To make paper plates trace a circle slightly bigger than the quarter on the paper and cut it out. Next place the paper on top of the quarter and center it. Push down the edges of the paper with your finger and run the wrong end of a pen around the edge of the quarter to make crease. In order to make clay plates cut out a circle of cardstock the size of the quarter and a size slightly bigger than the quarter. Now glue both papers together with the circle centered. Next flatten a ball of clay and press it onto the circle with the small circle in. Trim the edges so that the clay matches the paper. Bake like this and remove paper when it is cooled.

Next you can make cups using simply clay and a colored pencil, and you can also make paper cups for barbecues and dollhouse parties. Roll a piece of clay into a ball and push the pencil into it; next push it on a hard surface so the bottom is flat. Roll a little tube of the same clay for a handle and attach it to the side of the mug; you can twist one end to create a unique handle. Bake with the pencil inside, and pop it off the pencil when it is slightly cooled. You can also make paper cups buy simply cutting strips of paper and rolling then into a tube. Next cut a circle slightly larger than the opening of the tube and push it into the bottom of the cup. Remember to glue this so it does not pop out.

The last most important part of making this place setting is the pitcher. To make the pitcher take a medium size ball of clay and a wooden dowel, a thick marker, or some other item that can create the hollow body of a pitcher. Now push the dowel into the ball of clay and press the bottom down on a hard surface to flatten it. Next add a handle to the pitcher. Now take a skewer or dull tipped needle and push it into the top of the pitcher where it is opposite of the handle. Pull the clay outward gently in order to create a spout. This will give the clay enough play to be pulled off of the dowel and baked standing up.

I hope you enjoy all of these fun dollhouse projects and remember to play!

Gordon's Theories on Discipline in the Classroom


Thomas Gordon's theories on discipline in the classroom promote a healthy learning environment for students. Gordon "pioneered the teaching of communication skills and conflict resolution to parents, teachers, youth, and managers of organizations,' and, "2 million people have undergone his training programs worldwide" (Charles & Senter, 2004, pp.63). His theories on collaborative class management, communication roadblocks, I-messages, you-messages, and no-lose conflict resolution provide a classroom with discipline.

Collaborative Class Management

Gordon's theory on collaborative class management is used by nearly all classrooms in order to instill discipline. This method of management requires students to actively participate and make decisions concerning their learning. Students and teachers work together to determine lessons, set up the classroom, and choose methods of learning. This interactive means of discipline is a productive way to teach kids responsibility and accountability.

Communication Roadblocks

Discipline in the classroom can not exist if there is not effective communication. Communication roadblocks are a deterring force to discipline. These roadblocks can occur with a teacher who is "moralizing and telling the student what he or she ought to do" (Charles & Senter, 2004, pp. 63). Teachers should be aware of the presence of communication roadblocks in the classroom.

I-Messages and You-Messages

An important part of Gordon's theories on discipline and classroom management is I and You messages. It is important for a teacher to use the I form of communication instead of you-messages. I-messages explain how you "personally think or feel about another's behavior and its consequences" (Charles &Senter, 2004, pp.67). You messages place blame and do not effectively influence students. Gordon believed that students should be influenced by the teacher to do well instead of quilted into discipline. Being aware of the way messages are conveyed to students in the classroom is important to encourage and instill discipline.

No-Lose Conflict Resolution

This means of conflict resolution is important when trying to maintain discipline in the classroom. Teachers must present the students with a way to resolve conflicts where everyone feels better about it. Conflicts present the students and teacher with a means of learning. No-lose conflict resolution occurs when a teacher can start a discussion which helps the students learn from the conflict and figure out how to avoid it in the future. This effective means of discipline allows students to find a "way of ending disputes by enabling both sides to emerge as "winners" (Charles & Senter, 2004, pp.69).

Gordon's theories on discipline in the classroom are still utilized today across the world. Educators will benefit from understanding the Gordon's theories on collaborative class management, communication roadblocks, I-messages, you-messages, and no-lose conflict resolution.

Reference:

Charles, C. M., & Senter, G. W. (2004).Building Classroom Discipline (8th Edition)(8 ed.). Boston, MA: Allyn & Bacon.

B.F. Skinner's Theories on Discipline in the Classroom

B.F. Skinner's theories on discipline in the classroom have helped to mold the way teachers instill discipline in their students for decades. His theories were not directed at classroom behavior, but his findings have influenced and led the way in many classroom discipline methods since the 1960s (Charles & Senter, 2004). This essay will discuss the impact of B.F. Skinner's theories on discipline in the classroom.

Behavior Modification

Skinner wrote many articles and essays on "how our voluntary actions are influenced by what happens to us immediately after we perform a given act" (Charles & Senter, 2004, pp. 33). These papers led to the theory of behavior modification which is used everywhere in the educational field. Behavior modification refers to the use of reinforcement in order to shape the behavior of a student.

Constant Reinforcement

Skinner noted in many of his works that "much if not most of our voluntary behavior is shaped as we receive reinforcement immediately after we perform an act" ( Charles & Senter, 2004, pp. 45). This theory led teachers to use constant reinforcement as a form of discipline in the classroom. This type of reinforcement allowed students to learn new desired ideas, rules, and skills. This type of discipline must be done every time a student does something correct (Charles & Senter, 2004).

Intermittent Reinforcement

After rules and skills are established a teacher will then need to rely on intermittent reinforcement in order to remain a level of discipline in the classroom. Since the behavior is established the need for reinforcement lessens. The use of reinforcing stimuli is only needed for discipline occassionally (Charles & Senter, 2004).

Reinforcing Stimuli

In order to maintain discipline in the classroom according to Skinner's findings the use of reinforcing stimuli is necessary. Some examples of this type of reinforcement "knowledge of results, peer approval, awards and free time, and smiles, nods, and praise from the teacher" (Charles & Skinner, 2004, pp. 34). This type of positive reinforcement has been used for decades in the classroom as a form of rewards for discipline.

Conclusion

Skinner's theories on how humans react to reinforcing stimuli has played a large role in the education and discipline of students in the classroom. Although Skinner had no intentions on having an impact on education his theories have been popular and utilized for many years. Reinforcement is a positive way to discipline students, and it is a helpful tool in the goal of classroom discipline.

Reference:

Charles, C. M., & Senter, G. W. (2004). Building Classroom Discipline (8th Edition) (8 ed.). Boston, MA: Allyn & Bacon.

Father's Day Wallet Craft Ideas for Kids

 Father's Day is a special holiday for dads and there are some great wallet crafts kids can make for their dads. A wallet is a useful gift that is easy enough to make. This article will provide detailed instructions on creating wallet themed crafts with kids.

Felt

Making a felt wallet is fun and easy for young kids to make for Father's Day. For this craft you will need hard felt, scissors, and fabric glue. Start by helping kids decide how big the wallet will be. It is also useful to have a ruler and pen to measure and create straight lines, but a book or other straight object will also work fine.

Then cut a rectangle of the appropriate size. Then cut another rectangle of the same exact size, and finally help kids cut another rectangle that is slightly smaller in height. Help kids assemble the wallet by laying the first piece of felt on the table. Then add a thin line of fabric glue to the very edge of the rectangle. Make sure to leave the top line glue free because this is where the money will go. Then add the matching piece of felt to the top of the first one.

Next help kids add a line of glue around three sides of the small rectangle, and help them place it on top of the second rectangle to create a smaller pocket. Allow the glue to dry completely, and this project is complete. You can add pictures or other items to the wallet for decoration if you like as well.

Duct Tape

Any dad will love a duct tape wallet made by their kids. This fun Father's Day gift is unique and inexpensive to make. For this craft you will need scissors, duct tape, a piece of thick cardboard, and thumb tacks.

Start by assisting as kids cut a piece of duct tape the appropriate length of the wallet. Then tack it to the cardboard so the sticky side is facing upward. Then cut another piece the same size. Place it directly under the other piece, but allow it to overlap the first piece slightly so it sticks together. Add four more pieces in the same fashion. Use the tacks to keep the tape from sticking together.

Then help kids cut another piece of the same length and place it on top of the last piece with the sticky side inward. Continue with this until all the pieces are covered by another piece of duct tape. Then fold the bottom of the duct tape wallet up to meet the top. Use a smaller piece to secure the sides of the wallet. Help kids place a piece evenly on the edge like a book binding to secure the sides together; repeat this process on the other side of the wallet. Finally add a piece to the inside of the sides of the wallet to cover the piece of duct tape that was just applied and add stability to the wallet.

These unique Father's Day crafts are fun for kids to make, and dads will love using a wallet that is made by his children.

Father's Day Crafts for Preschoolers Using Pipe Cleaners


Pipe cleaners are a cheap and fun material to use for Father's Day crafts with your preschoolers. This is a special holiday for dads, and receiving homemade gifts from their children is a great way to celebrate this holiday. This article discusses how to create pipe cleaner crafts with your children for this Father's Day.

Tie Rack

A tie rack is a great gift for a dad who wears suits to work. For this project you will need pipe cleaners, hot glue, a hot glue gun, and scissors. You will also need a hanger for the base of this craft. Start by helping preschool children decide on which colors of pipe cleaners their father will like.

Then help children twist the pipe cleaner around the hanger. Add hot glue to secure the pipe cleaner in place. Continue in this process and make sure to assist your child so the pipe cleaner wraps around the hanger tightly and securely. When the entire hanger is covered this craft is ready to give to dad. Use the scissors to remove excess pipe cleaner from the end of the hanger. Father's can hang their ties on this hanger without worrying that their ties will slip off onto the floor.

Pen Holder

Dad's desk or workbench will look great with a homemade pen holder. For this craft all you need is pipe cleaners, glue, scissors, ribbon, and a tin can. Help kids sort through the pipe cleaners and decide on the right colors and the order they will go in.

Then help kid bend the pipe cleaner around the can. Add glue to secure the pipe cleaner in place, and continue to add pipe cleaners to the can. When the entire can is covered add the ribbon to the inside edge of the top of the tin can.

Coaster

Preschoolers will love making this coaster for their dads on Father's Day. You will need a sheet of foam, pencils, scissors, pipe cleaners, hot glue sticks, and a hot glue gun. Start by drawing a square on the foam sheet. Then let kids cut the shape out of the foam.

Cut the pipe cleaners to fit evenly across the length of the square. Assist as preschoolers glue the pipe cleaners across the entire coaster. Lining the coasters up evenly will create a nice even pattern on the coaster. Then use the scissors to trim any excess.

These Father's Day crafts are perfect for preschool children. Have fun with your preschool kids by making these crafts, and their dads will appreciate these awesome gifts.

Father's Day Crafts for Kids Using Paint


You can make Father's Day crafts with kids using paint, and paint is inexpensive so these gifts will save you money as well. This article will provide you with instructions on creating fun gifts for Dad on his special day.

Picture Frame

A picture frame is easy to make and decorate with children. For this project, you will need paint, a palette, newspaper, paintbrushes, cardboard and scissors. Help kids cover the work area with newspaper. Then pour some paint onto the palette.

Cut the cardboard into a rectangle, and then cut the center of the rectangle out to make a frame large enough to fit a photo. Let the kids paint all over the frame. Young kids can cover the frame with bright colors, and older kids can make patterns or write messages. When the paint has dried, a photo will complete this craft.

Coffee Mug

A coffee mug can be easily painted to be unique, and you do these crafts with kids by using special ceramic paint markers. For this craft, simply cover the work area with newspaper. Then help kids paint the chosen coffee mug for Dad with the paint markers. Kids can paint designs, write a message or just color it all over. Follow the directions for the paint markers because they may have to be baked to seal the paint for dishwasher safety.

King Crown

Another easy and fun craft for dads on Father's Day is a crown. For this project, you will need paper, paint, scissors, gems, a pencil, glue and tape. Start by helping kids cut the paper so it is long enough to fit on Dad's head. Then use a pencil to design the shape of the crown. Points, stars and clovers are popular patterns for crowns.

Help kids cut the crown out of the paper, and use paint and gems to decorate the entire crown. You can also write, "King for a Day" or "No. 1 Dad" on the crown if you like. When the paint is dry, tape the ends of the crown together.

Making Father's Day gifts with your kids is a fun way to craft and provide the whole family with long lasting memories.

Saturday, May 15, 2021

The Methods of Naturally Building and Why They Are Efficient


When most people hear of natural building they disregard it, and they assume that the way we have been building for years is obviously the best because we have been doing it for so long, but they are wrong. Natural Building is not only efficient but also good for the world. The building structures of most homes are foolish, and "buildings account for one quarter of the world's wood harvest" (Kennedy et al., 2002). The idea of working with nature on a basic level when building houses instead of working against it is something more people should understand and employ.

Cord wood is a method of building that was always slightly mysterious to me, I learned from this book that in order for the wood to rot it must stay wet for a long period of time, but since cordwood "breathes along end grains" the wall dries very quickly and the fungi that it needs to make the wood rot does not have a healthy living environment (Kennedy, Wanek, Smith, 2002). Cordwood is a method of building that I will use because it is attractive and efficient.

Certain methods when building will help a house in multiple ways; an example of this is when you want "to keep a house warm in the winter locate it halfway up a south facing slope so that frost and cold air are blocked, and free energy can fill the dwelling" (Kennedy et al., 2002). This idea ties in with the earthship design I am creating, and it uses the position in more ways than I had anticipated. I think that it is very beneficial and wise to make sure "every function is met by multiple elements" (Kennedy et al., 2002).


Another idea that I have adopted is organizing floor plans around activities; and I think this will be a great help when creating my floor plan later on. The basic idea is simple, but it makes a lot of sense when designing and building a house. For instance I have put the art room in my house on the far end because it will be quieter and peaceful; I chose this because the living room, master bedroom, and kitchen will be on the other end of the house, and this will keep my art room separate and secluded.

These techniques are beneficial to anyone who is planning on constructing a house or any other building because they help the home owner have a more efficient home, and they are useful of energy instead of wasteful. It is important to look at many different techniques when building your own house, but I encourage you to look into natural building for the sake of your own comfort, but also for the sake of the earth.

Reference:

Kennedy, J., Wanek, C., & Smith, M. (2002). The art of natural building. Gabriola Island: BC, Canada: New Society Publishers.


Wednesday, May 12, 2021

Interior: Use of the Color Blue in Your Home


The use of the color blue in the interior of your home can add a wide range of atmospheres from relaxing to dramatic. Blue comes in so many shades, and it can add that special touch to your home. This article will discuss the interior use of blue in your home decorating.

Walls and Floors

Blue is a great color for walls and floors and the varying shades can cause different feels. Lighter shades of blue and pastel hues will add openness and an airy feeling to rooms. Dark shades can shrink a room unless it is paired with lighter shades such as white or pastels. The combination of dark blue and light colors will add a dramatic look to a room.

The amount of blue or the space you use this color in will change the atmosphere this color will create. Using a blue border around a wall will add depth and detail. Blue doors and molding adds elegance and detail to home decor. You can choose these details to compliment or contrast a room. Dark blue molding compliments light colored rooms. Pastel blue details combine nicely with dark shades of blue, grey, green, and neutral colors.

Furniture

Blue furniture can come in a variety of colors. Bright shades and deep hues will add drama and personality to a room with pale walls. Sky blue adds a cheerful feeling, and pastel blue adds country charm especially if it has a weathered look to it. Slate blue is very attractive and sophisticated, and it will match well with many other color combinations. Blue furniture is a great way to add blue to a room without painting the walls.

Accessories

There are many blue accessories that will add personality in home decorating. Blue is a popular color for glass, and lamps, vases, and blue glass bottles will add a stylish feel to your home. Blue ceramic is charming and goes great with a country or rustic feel. Blue curtains can come in heavy or light material. They can add a cool tone of relaxation while keeping cold air out in the winter. These simple accessories add blue to a room with little effort.

Blue comes in many tones. Vibrant aqua shades are reminiscent of the ocean, morning glory blue is a pale and warm hue, and midnight blue is dark and deep. All of these colors can be used in home decorating to add that unique feel to the interior of your home.

Father's Day Cake Decorating Ideas


Dad's love cake, and there are many great Father's Day cake decorating ideas that everyone can enjoy creating and eating. Cake decorating does not have to be left to professionals, and the thought behind the cake always makes the cake taste even sweeter. Here are several cake decorating ideas for Father's Day.

Shirt

Whether your dad works in an office or on the basketball court, a shirt cake is an awesome idea. All you need to do is make a square or rectangular cake. You can make more than one layer if you like. Then ice the entire cake white. Use a pastry bag and colored frosting to design the type of shirt that reminds you of dad.

BBQ

Another unique cake idea is a barbecue. Your father will smile when he sees the awesome cake. It can be made using round cake pans. Frost the sides in gray, and the top with black frosting. Then use a pastry bag to make the grill lines. Also create burgers for the grill by making a small round cake and cutting it into smaller circles. You can make hot dogs too by using candy clay or chocolate molds.

Fish

A big fish cake is fun for young children to decorate, and it is important to have lots of candy and sprinkles for this cake. It is made using two round pans. One pan will be the body, and the other pan can be cut into pieces to make the fins. Ice the entire cake and use the candy to add scales and different colors to the fins. Also use candy to make an eye.

Super Dad

On Father's Day, your dad is a superhero, and he should have a cake that reflects his magnitude. For this cake decorating idea, you will to make an upside down triangle-shaped cake. Ice the sides of the cake with baby blue frosting and the top with yellow. Then use red frosting to write dad on the cake.

These cake decorating ideas for Father's Day are fun to create for any dad. Try them and you will all be pleasantly surprised.

Edible Father's Day Crafts that Kids Can Make as Gifts


Edible crafts are always a good gift idea for dads on Father's Day. Children will love making these projects, and they are easy to make. This article supplies you with information on edible Father's Day crafts that kids can make.

Barbeque Sauce

Father's Day is the perfect holiday for this edible gift because it is celebrated in the beginning of barbequing season. To start creating this gift idea you need to find barbeque sauce recipe you enjoy. Check out this link to choose from the top 10 barbeque sauce recipes.

Work with kids to create the barbeque sauce. When you are all finished you will need canning jars, wax paper, pinking shears, ribbon, heavy paper, a funnel, paper towel, a hole puncher, and a pen. Start by filling all of the jars with the sauce. Then cut squares out of the wax paper using the pinking shears. Also cut small rectangles out of the paper.

Write the name of the sauce on one side of the rectangle. Also right a message on the other. Punch a hole in the corner of the paper. Cover the jar with the flat part of the lid. Place the wax paper over the jar and place the ring over the wax paper. Cut a long piece of ribbon, thread it through the hole punched in the paper, and tie it around the lip of the jar. These tasty gifts are easy crafts to give away.

Tie Cake

Another fun craft for kids to make for their fathers is a tie cake. For this gift you will need cake mix, canned pumpkin, white colored frosting, food coloring, a square cake pan, a loaf pan, bowls, spoons, knives, and a pastry bag. If you don't have a pastry bag you can roll up a piece of wax paper.

Start by assisting as kids mix the cake mix with the pumpkin, fill the two pans, and bake according to the directions on the cake mix package. Allow the cake to cool when they are done, and mix the frosting while you are waiting. Start by placing some frosting in a bowl. Then help children add food coloring of your choice to the frosting. Mix it together thoroughly.

When the cakes are cooled, flip them over onto a plate. Use a knife to cut the corners off of the loaf cake. Then trim a little of the cake off of the sides of the loaf. This will make the base of the tie, and can be placed on top of the square cake. Then add two corners together in a triangle shape at the top of the tie to make the knot. Place the two triangles on either side of the knot to create the collar. Ice the entire cake with the white frosting.

Then ice the tie using the colored frosting. Mix another color with some frosting in a separate bowl and put the frosting in the pastry bag. Write a special Father's Day message for your dad on the cake, and add details to the tie.

These edible gift ideas are perfect crafts for children, and dads will love them too. Try creating thee projects to make the children and father's in your life very happy on this special holiday.

What is Yeast and How Does it Work?


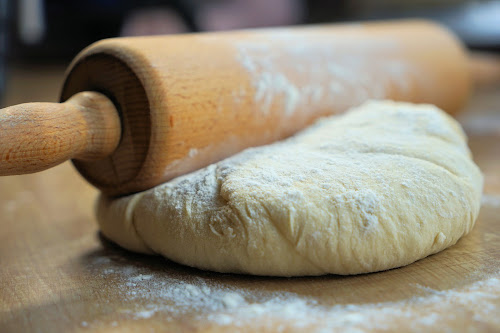
Everyone loves delicious bread, but many people do not realize how important yeast is in the process of making bread. If we didn't have yeast we wouldn't have a lot of the things we enjoy today such as rising bread, wine, whisky, or beer. Although yeast is so integral to the food culture of our world many people do not know much about yeast. This article will describe what yeast is and how it works.

Yeast is a "one celled plant" that is so small when alone you need a microscope to see it (Leokum, 1986, p.184). I know yeast is small, but I can see it every time I use it to bake bread; how is this possible? Yeast may be one celled, but it grows in "colonies" (Leokum, 1986, p.184). Yeast is a valuable part of everyday life. Yeast is almost "colorless," and it is considered a "fungus" because it ddoes not produce chlorophyll or any other means of feeding itself (Leokum, 1986, p.184).

As yeast grows it turns into two substances, and these substances help cause the changes in the foods we use them for. The two sunstances yeast forms are "enzymes" known as "invertase and zymase," and these enzymes "convert starch to sugar and sugar to alcohol, carbon dioxide, and energy" (Leokum, 1986, p.184). This process is known as fermentation and this is what causes bread to rise and juice to turn into wine. Yeast may be tiny, but it has a powerful ability to change things.

Many years ago the Egyptians discovered yeast, and they used it in their bread making, but not everyone else knew about yeast. Bread makers of the past realized that leaving their bread out to rest for a while would provide them with lighter fluffier loaves. They did not know it at the time, but this process worked because yeast strands from the air would get in the bread and cause it to rise. These days bread makers add sugar and yeast on purpose to make rise. We now know that the yeast eats the sugar and turns it into carbon dioxide, and the carbon dioxide forms bubbles inside the loaf. The oven's heat "drives off the carbon dioxide and leaves a dry light loaf" (Leokum, 1986, p.184).

Yeast is an amazing fungus that helps us to enjoy the foods and drinks that we love so every time you sip a beer or eat a sandwich remember the one celled yeast plant and enjoy!

Reference:

Leokum, A. (1986). The Big book of tell me why. New York, NY: Grosset and Dunlap.

What is a Master's Degree?


Many people hear about master's degrees and are not sure exactly what one is. This type of degree is a valuable asset that can add a lot of new options and benefits to your career path. Master's degrees have many benefits that can help you improve your life in many ways.

A master's degree is a degree that is obtained after a bachelor's degree and before a doctorate degree. It is a two year degree program, and a bachelor's degree is usually required before obtaining a master's degree.

The benefits of a master's degree are plentiful, and this degree can add to your career in many ways. Higher pay is a common benefit of a master's degree, and this type of degree proves that you have exceptional knowledge in a certain area or field.

Another benefit of a master's degree is new career path options, and gaining a master's degree in a new area of expertise can allow you to obtain a different career. Master's degrees give you the knowledge and certification needed to transition into a different field.

Master's degrees are obtained through two years of education that have similar courses to undergraduate degrees, but the coursework is more specialized and in depth. After four years of academic work students in a master's degree program are expected to have higher analytical skills, and many master's degree courses require thorough discussion of topics. Another required part of a master's degree is a thesis, and this requirement is usually in the format of an extended research paper on the major topic of your degree.

There are many different types of master's degrees available, and there are three major areas of master's degree programs. Master's of arts, science, and business administration are the common master's degree programs available, and they all have specific degree majors.

Master's of Art degree programs entail several subjects including psychology, English, counseling, education, and human resources. These degrees are not the only master's of arts programs available, but they are commonly acquired.

Master's of Science degrees are another type of master's degree programs that are based on scientific theory and information. Some common master's of science degree program options are environmental studies, computer science, medicine, and information science.

Master's of Business Administration degrees are popular programs that focus on specific business subjects such as marketing, accounting, management, and advertising. These master's degree programs will provide you with extensive knowledge in relation to business information and skills.

A master's degree is a valuable degree for increasing career success on many levels, and these two year degree programs will provide you with valuable information and skills that will help you in your career goals.

The Great Artists of the Romantic Movement


One of my favorite art movements is Romanticism. This type of art flourished from 1800-1840, and it was inspired by the "dark ages" where "barbarianism, superstition," "gothick, sublime", and "miracles" were popular culture (Gardner, 2001. p.864). Romanticism started in "1770", and it is still alive today; it has even inspired the soundtrack to the epic film Star Wars (Brians, 1998).

This movement was based on the idea that all that was artificial and false should be banned and honest emotion should prevail. This movement was so unique and interesting because it was about rebelling against the common values of society. Imagination and emotion was revered over reasoning and rules in this art movement. Individualism and creativity were highly valued during this time in art(Gardener, 2001). The heart was revered over the mind, and many preconceived ideas on art and beauty were thrown to the wind. It is interesting to note that Neoclassicism was happening before Romanticism, and it was a type of art based on rules and modeled after art from the Renaissance. It is intriguing to see the pattern of art movements, and I realize that the movement based on reason led to a movement based on imagination.

William Blake was an artist of the Romantic Movement that was appealing to me. He was said to be "inspired by dreams," and his engraving titled Ancient of Days is beautiful and inspiring (Gardener, 2001, p. 865). The dramatic use of light and dark in the contrast of the bright yellows and orange of the sky and sun opposed to the dark brown and black of the background and landscape worked very well and added strong emotion to the piece. I also enjoyed the linear aspects of the light and stance of the figure. This piece embodied the Romantic style with its use of emotion and passion.

Henry Fuseli is another great artist from the Romanticism period. His painting The Nightmare embodies the work of the Romantic Movement. This painting depicts a woman sleeping or possibly dead with a demon crouched on top of her smiling; in this picture there is also a dark spirit of a horse or similar creature lingering in the shadows (Gardener, 2001). This painting suggests the idea of dreaming and the darkness of nightmares. Many of Fuseli's paintings portray gargoyles and creatures of the night, and they have a dark almost menacing theme to them.

The Romantic Movement was an amazing and very inspiring movement in art. The raw use of imagery and emotion combined to leave the viewer in awe and wonderment. I love the humor and clever themes. Romanticism was a great time for art, and it is important to know and appreciate the work of many of the artists of this time.

References:
Brians, P. (1998). Romanticism. Retrieved June 9, 2009, Web site: http://www.wsu.edu/~brians/hum_303/romanticism.html

Gardner, H. (2001). Gardner's art through the ages. Orlando, FL: Harcourt College Publishers.

Gishmas 2021 List

 Day 1 Challenge: December 20th – Image or Video What powers GISH? Love, actually. So, let’s spread some cheer. Using the GISH App or search...