Showing posts with label Children. Show all posts

Monday, May 24, 2021

Summer Kids Craft: Floral Charm Bracelet

A great summer kids craft is a floral charm bracelet. Floral charm bracelets are great summer craft projects for kids. They will remind you and your kids of the summer all year round. This article will provide you with detailed instructions on creating a floral charm bracelet with your kids this summer.

For this summer kids craft you will need a piece of chain long enough to fit around your kid's wrist. You will also need small fake flowers, scissors, a hot glue gun, hot glue sticks, wire, pliers, beads, 2 O-rings, and a clasp. Start this craft by helping kids cut the flower buds off of the stems.

Then plug in the hot glue gun. Help kids cut a few 3 inch sections from the wire. Use the pliers to bend one end of the wire into a small loop. String a bead or 2 onto the wire. Help kids use the pliers to twist the wire into another loop right above the beads. This will hold them in place.

Next bend the ends of the wire into a loop a few circles deep. Open an O-ring slightly with the pliers. Sting the end of the wire onto the ring and set aside.

Next add the clasp to the bracelet using the O-rings. Start by bending the rings slightly open with the pliers. Then attach the chain to each side of the clasp using the rings and pliers. Close the rings with the pliers securely to make sure your bracelet stays together.

Before attaching all of the pieces of this bracelet it is important to make a plan. Help kids arrange the flowers across the wire in the order they would like them to be when the bracelet is done. Help kids place the wired beads in the places they would like as well.

Start help kids assemble the floral charm bracelet by add the beaded wires to the chain. This is done by threading the O-ring that is attached to the wire through the links in the chain. Then glue the flowers to the chain with the hot glue gun. Make sure to add a few drops of glue on both sides of the chain to secure the flowers in place.

This summer kids craft is easy and fun. A floral summer charm bracelet is a great way for you and your kids to celebrate the beauty of summer all year round. Try this easy summer craft with your kids!

Wednesday, April 21, 2021

Mother's Day Silverware Crafts with Kids


You can make Mother's Day silverware crafts with your kids easily. Silverware can be purchased inexpensively at local dollar stores, thrift stores, and yard sales. This article will provide you with instructions for creating a wind chime, bouquet, and photo holder with your kids for Mother's Day.

Wind chime

For this Mother's Day craft you will need several different pieces of silverware, fishing line or dental floss, scissors, and ribbon. You can also use pliers to make this craft easier for kids.

Start this craft by helping kids bend a piece of silverware into a circle. Then cut a piece of ribbon about 12 inches lo9ng and tie it to both sides of the circle. Help kids cut several pieces of dental floss and tie the ends to pieces of silverware. Tie the other ends of the floss to the circle. This easy Mother's Day craft is a great gift kids can make for mom.

Bouquet

For this Mother's Day craft you will need several pieces of silverware, a glass jar or tin can, a hot glue gun, hot glue sticks, buttons, pliers, ribbon, scissors, paint, and a paint brush.

Start this craft by helping kids turn the silverware into interesting floral shapes. This can be done easily by bend prongs on the forks. Handles can also be bent to add detail to the stems of the flower.

Then help kids paint all of the silverware to look like flowers. Glue buttons to the inside of spoons to resemble flowers as well. When all of the silverware has dried tie a ribbon around them and place them in the tin can vase. This Mother's Day craft is easy for kids when you use inexpensive silverware, and plastic silverware can also be used.

Photo Holder

You will need two forks, a flower pot, a piece of foam that fits snugly inside the pot, moss, small fake flowers, ribbon, scissors, glue, and two photos for this Mother's Day craft.

Start this craft by placing the foam inside the flower pot. Then use the glue and the moss to completely cover the foam. Stick the handles of the forks into the foam and add more moss and flowers around the handles to secure them in place.

When the glue has dried tie a ribbon around the pot and place the photos securely in between the prongs of the forks. This Mother's Day craft is a great gift that kids will love to make.

Silverware is an inexpensive and fun medium for these Mother's Day craft projects. Kids will love being creative, and moms will enjoy these unique gifts.

Wednesday, April 14, 2021

Fun Kid Crafts: Three Pinecone Crafts


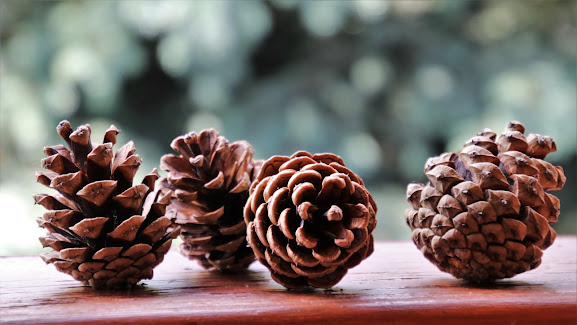
A pinecones is one of my favorite items to use for natural crafts. They are plentiful, and they come in various shapes and sizes. They can be used for many different craft projects, and this article will discuss three different craft projects that you can make using pine cones.

A pine cone angel is precious, and it only requires the use of pine cones, leaves, glue, a round bead, some silver or gold wire or ribbon, and paint. You can also use glitter for this project if you like. Simply paint the bead like a head. Paint a pretty little face on the bead and paint the cone the color of your angels dress. Now add some pretty details to the leaves because they will be your wings. Glue the wings behind the pine cone, and remember to glue them high enough to leave room to glue the head to the leaves. Now glue the head on, and add the wire or ribbon as a halo. Your angel will be a great addition to your nature crafts

Pine cone fire starters are a simple and fun project that only requires a microwave, old wax from used candles or broken crayons, and newspaper. Simply melt the wax or crayons in the microwave starting with 30 seconds and ending when the wax is almost completely melted. Now dip the pine cones in the wax and let them rest to dry on the newspaper. These pine cones will help start any fire, just throw them in and light them. Remember you can mix crayons with the wax as well to add some fun colors.

Pine cone Christmas trees are a lot of fun to make and they are great Christmas ornaments. All you will need for this project is some pine cones, a bottle cap, paint, glue, and some beads or flowers. Glitter is also fun for this project, but it is optional. Simply paint the pine cones green, paint the cap silver or red, and glue these two pieces together. You will have your basic tree. Now you can embellish it using beads, silk flowers, and glitter. This project is a great gift that children can make during the holiday season.

Pine cones are everywhere, and they are inexpensive if you live in a place that does not have pine cones. They are great for crafts because they are so cheap, and it is fun to collect them with kids in order to complete your crafts projects. I hope you have enjoyed these projects, and have fun crafting!

Piaget's Developmental Theory and Stages of Cognitive Development


Understanding children, how they develop, and how they learn is one of the most important jobs of a teacher, and there are many theories based on this understanding. Jean Piaget was a "biologist who originally studied mollusks, but moved into the study of the development of children's understanding;" he studied children and their development and learning habits intensely (Atherton, 2009, pp.2). Piaget's developmental theory is still studied today by education majors in order to understand how children develop, think, and learn, and this article will discuss Piaget's developmental theory and stages of cognitive development.

Sensori-motor

This is the first stage of cognitive development in children, and this stage occurs from birth to two years old. This developmental stage is exemplified by a child's ability to "differentiate self from objects," and a child comes to the realization that "things continue to exist even when no longer present to the sense" (Atherton, 2009, pp.6). this stage in Piaget's developmental theory also suggests that a child is starting to act with purpose.

Pre-operational

The second stage of cognitive development includes children from the age of two to seven years old. This developmental stage is when a child starts using words and images to relate and symbolize objects and thoughts; during this time children will still find it hard to see from the perspectives of others (Atherton, 2009). This stage of cognitive development also signifies a child's inability to classify objects by more than one feature.

Concrete operational

This stage of Piaget's developmental theory encompasses the ages seven to eleven. During this developmental stage children learn to classify "objects according to several features and can order them in series along a single dimension;" children will also be capable to "think logically about objects and events" during this developmental stage of cognitive growth (Atherton, 2009, pp.9).

Formal operational

The final stage of cognitive development in Piaget's theory occurs from the age of eleven and up. This stage signifies a child's ability to hypothesize and test methodically. This developmental stage is also when children will become "concerned with the hypothetical, the future, and ideological problems" (Atherton, 2009, pp.11).

Piaget's developmental theory has led to many other theories on children's development, and some have argued and altered his theories, but his studies have had a very important impact on education. Piaget's cognitive development theory has played a significant role in education theory on a child's ability to learn.

Reference:

ATHERTON J S (2009) Learning and Teaching;Piaget's developmental theory[On-line] UK: Available: http://www.learningandteaching.info/learning/piaget.htmAccessed: 1 April 2010

Tuesday, April 13, 2021

3 Fun and Informative Earth Day Lesson Plans


Earth day can be a very fun and exciting time for children in the classroom. Here are 3 lesson plans that can help students celebrate earth day .

The first lesson plan that is appropriate and fun for teaching children about earth day is the earth day garbage parade. This lesson plan is appropriate for kids of ages 3-12, and it is a lot of fun. Have students collect garbage around their home and school and bring in one small plastic bag of trash. Items that they should save are bottles, papers, bottle caps, and anything they seem to find interesting. Make sure all items are brought in clean, and have markers, paints, and glue available. Now pile all of the garbage on a table in the middle of the room and let all the students pick items that that they would like to use. You can have the students create masks, puppets, and banners. It is a good idea to bring some examples of things they can make. You can also bring in beans and rubber bands and have the students make different musical instruments. Paint and color all of the items brightly, and assemble a line and start your parade. This lesson helps teach students to recycle and have fun!

Another lesson plan that is appropriate for students from the age of 3 to 12 is to grow their own plant. Bring in seeds, plastic cups, and dirt, and have each student plant their own seed, and water it. For older students you may want them to use different seeds and research each plant. Have the students document the plants growth over the course of the month; also have the students document the watering and light schedule for each plant. This is most effective if done with perennial plants so the students can later plant a garden on the school property or a local park. The use of herb seeds works well for this project.

Another earth day lesson plan for students from ages 3 - 12 is paper making. Discuss with the students the use of paper in society, and the amount of trees wasted because of our paper waste. Have students bringing junk mail, and paper that would normally be thrown out at their homes. You will need a small screen that has been attached to a wooden frame, or a small window screen that can be found at a thrift store. You will also need a food processor and a tub or tuber ware. Have all the students rip the paper up into little pieces and soak the pieces in water for half an hour. Next processes the water and paper mixture until the paper is finely chopped. Now mix the paper and water pulp with more water inside the tub. Have the students take turn dipping the frame into the mix. Once the frame is coated let some of the water drip out, and cover it with a piece of cardboard; next you must flip the frame and cardboard over so the pulp will come off. This will take a little getting used to, but it is not very hard. Allow all of the paper to dry completely and use the paper for another earth day project!

These lesson plans can help you teach valuable earth day lessons to your class this earth day!

Wednesday, July 9, 2014

Physical Developments of Young Children and Adolescents


Children grow up so quickly, but they grow differently at every age group. Different skills are obtained, and different interests occur. Physical development is a natural occurrence in youth, and they can be categorized by different age groups. The progression of infancy to adulthood is important to study when teaching children and dealing with children on a constant basis. It is also important to know about the physical changes in children and when they occur if you are a parent. From early childhood to adolescence, it is important to understand how a child develops physically.

Early childhood is a developmental age groups that includes children from the age of two to six years old. Early childhood is characterized by physical developments. During early childhood children change physically because they loss their baby features. Their features become less soft and their limbs get longer and become more in proportion to their bodies. At the early childhood level children have large amounts of energy and enjoy "running, hopping, tumbling, climbing, and swinging" (McDevitt & Ormrod, 2004, p. 106). Fine motor skills are developing and the need for afternoon naps are decreasing during this age group.

Adolescence is a developmental age group that encompasses children from the age of ten to eighteen. Early adolescence includes children from the age of ten to fourteen and these children grow rapidly, and this is also the time when puberty begins. Children of this age have more "risk taking behavior", and they are "self- conscious of resulting physical developments" (McDevitt & Ormrod, 2004, p. 107). Late adolescence is the age group that includes fourteen to eighteen year olds. During this age girls "complete their growth spurts" and attain their "mature heights" (McDevitt & Ormrod, 2004, p. 107). Boys are likely to increase in size as well during this age. Both sexes will have extreme appetite increases and increases in sexual activity. Late adolescences are more prone to making risky decisions such as unprotected sex, drug use, and eating disorders during this period of time.

All children are different. All children have their own personalities and grow at their own rates, but there are basic age groups that children can be identified by. These age groups are characterized by certain physical developments. It is important to recognize and understand these developments.

References:

McDevitt, T., & Ormrod, J. (2004). Child Development: Educating and Working with Children and Adolescents (2nd ed.). : Prentice Hall

by Sarah Ganly

Thursday, March 14, 2013

Spring Pompom and Pipe Cleaner Crafts with Kids

You can easily create spring pompom and pipe cleaner crafts with your kids. Pompoms and pipe cleaners are fun crafting mediums for kids in spring because of their versatile nature and bright colors. Here you can find pompom and pipe cleaner crafts perfect for your spring crafts with kids.
Caterpillar
With spring, come caterpillars, everyone favorite many legged friend, and this craft is cute and cuddly to make. For this craft you will need green pompoms, wiggly eyes, a hot glue gun, hot glue sticks, scissors, and pipe cleaners. Start by assisting kids as they glue several pompoms together in a row.
Then help kids cut the pipe cleaner into 12 even pieces. Bend the ends of each piece at a 90 degree angle. Then glue two pieces to the top of the head of the caterpillar like antennae. Then glue the other pieces along the bottom of the caterpillar for feet. The finished product is a cute little caterpillar for spring, and it can be placed anywhere in your home to added decoration.
Flower Bouquets
Spring flowers are always festive, and kids will like making this craft because it is pretty and is a good gift. For this project you will need large pompoms, straws, green paint, a paintbrush, a hot glue gun, hot glue sticks, scissors, and green pipe cleaners.
Start by helping kids paint the straws green; it is a good idea to place newspaper on the work area to avoid messes. Then help kids cut the green pipe cleaner into three pieces. Kids can then fold each piece in half and twist the two ends together. Then help kids pull the centers slightly apart to create leaves. Assist as kids glue the pompoms to the top of the straws, and help the kids glue the pipe cleaner leaves to the side of the straws. These pretty flowers are great for spring crafts. They can be placed in a vase or a glass jar. Add some sparkles or buttons to the pompoms for a varied look.
These spring themed crafts are easy and inexpensive to make with kids. Pompoms and pipe cleaners allow for many different projects, and these crafts will welcome spring into your home and promise good times with your kids.

Gishmas 2021 List

 Day 1 Challenge: December 20th – Image or Video What powers GISH? Love, actually. So, let’s spread some cheer. Using the GISH App or search...